Face Rig.
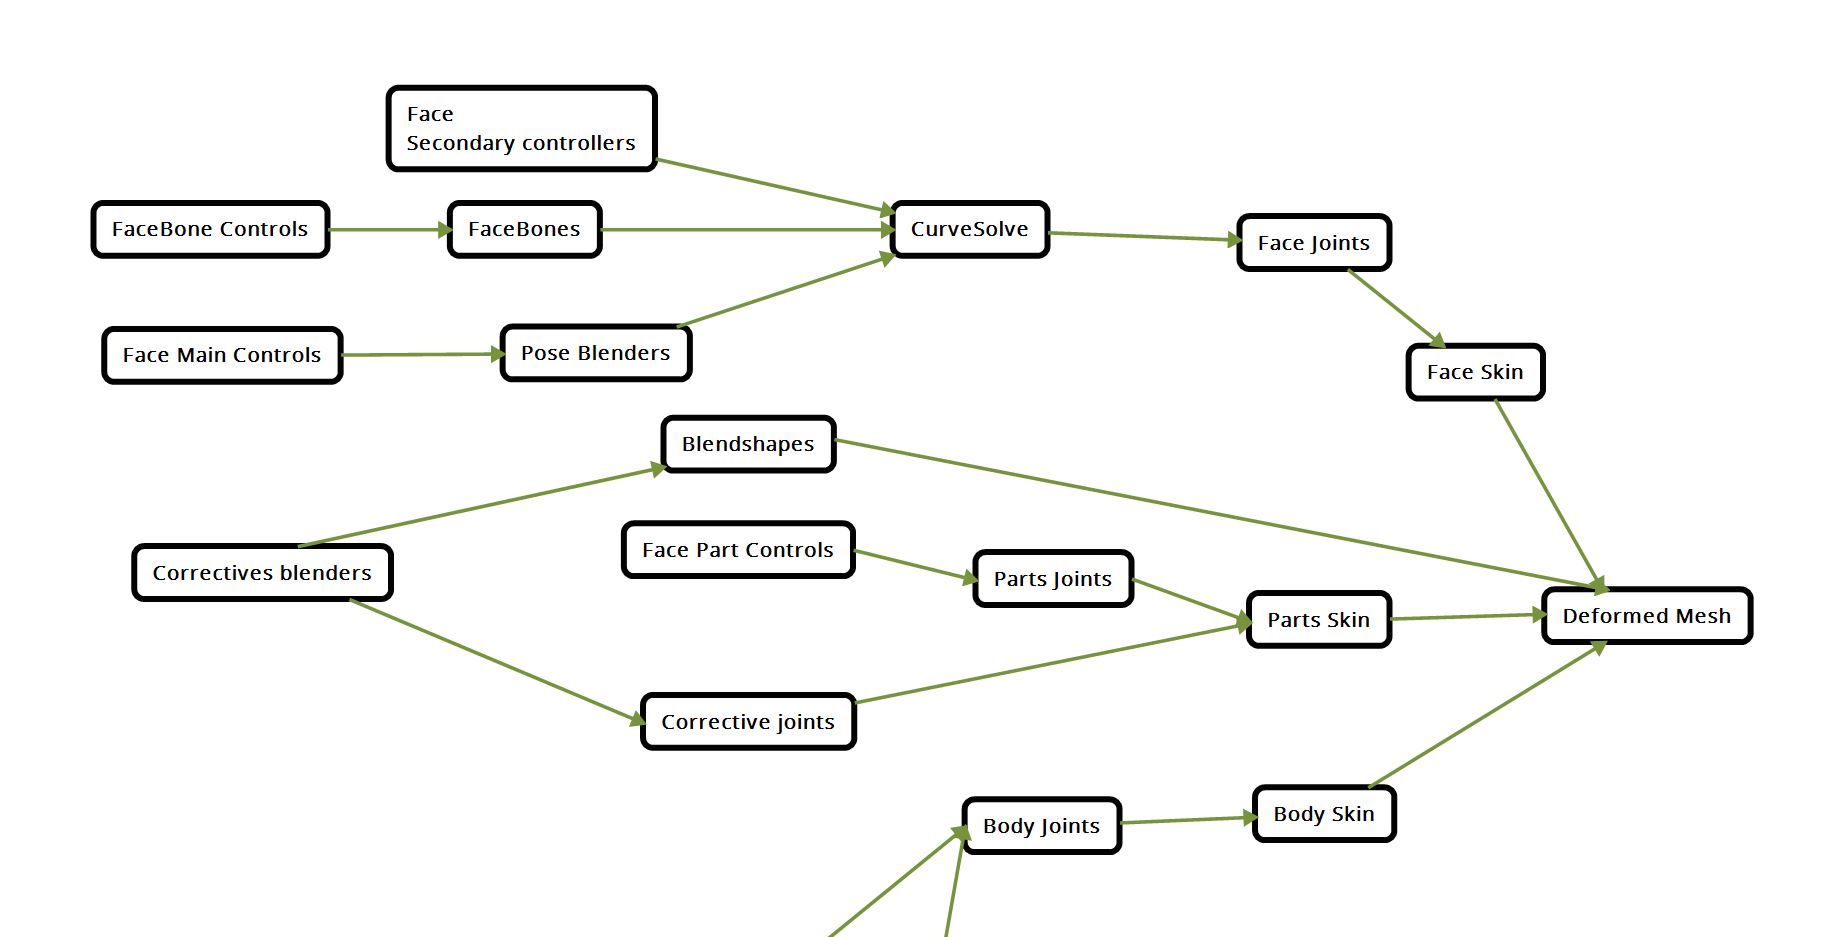
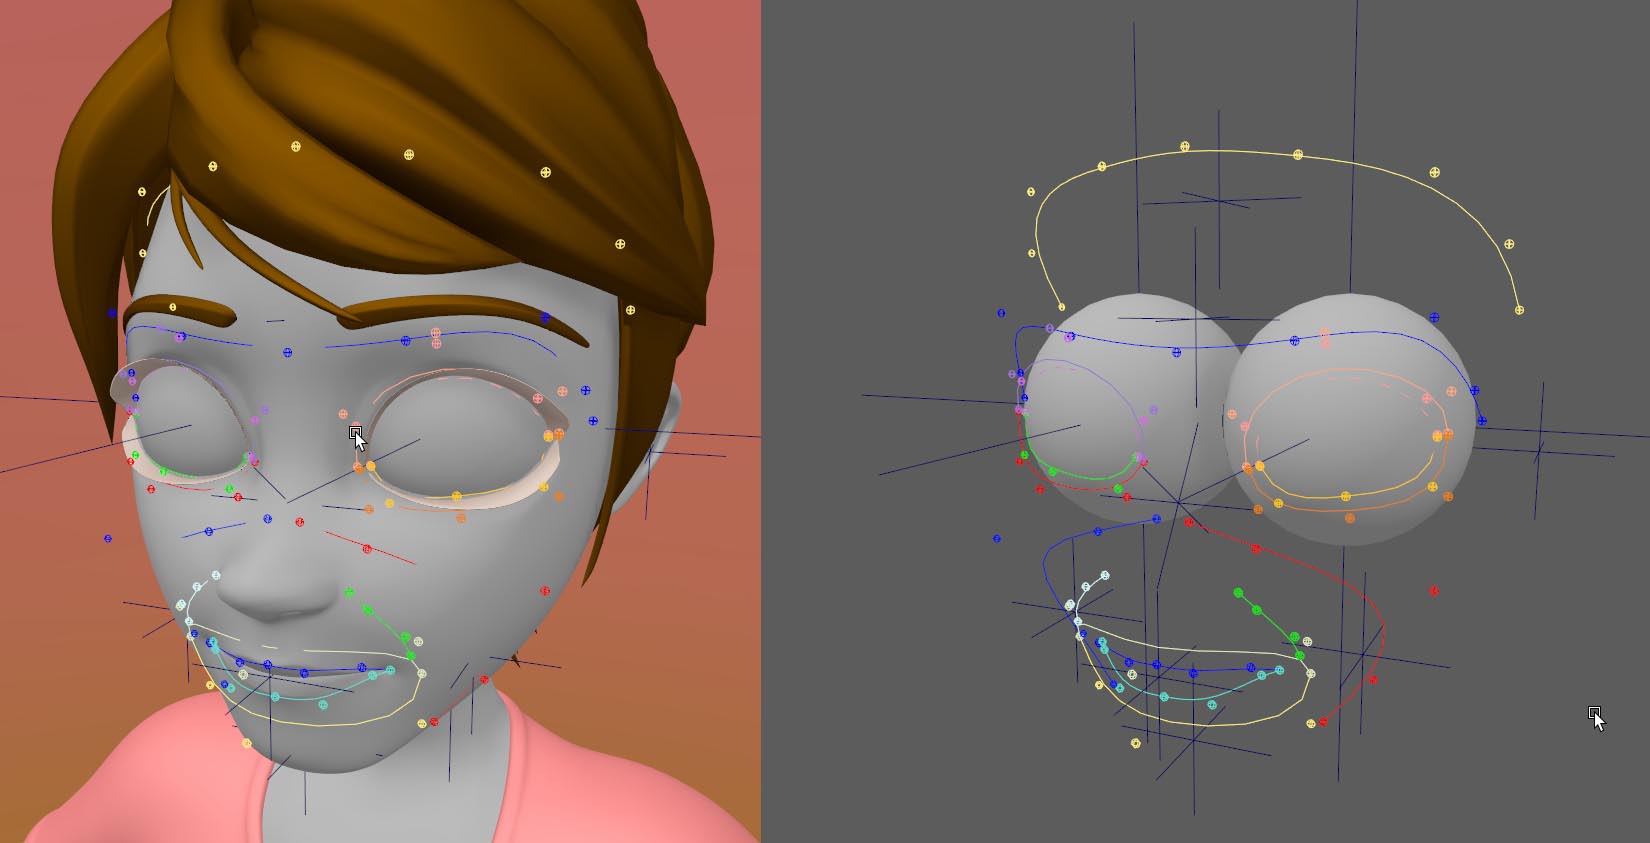
Here is a simplified diagram of how a face rig works after it is built.
Face MetaChain.
Face Metachain is a custom node that describes future face chain.
Naming.
{side}_{name}_{type}_mtnt
type can be module - mod, chain - chn, face bone - fbn, name should be one word. No underscores. Camelcase is okay.
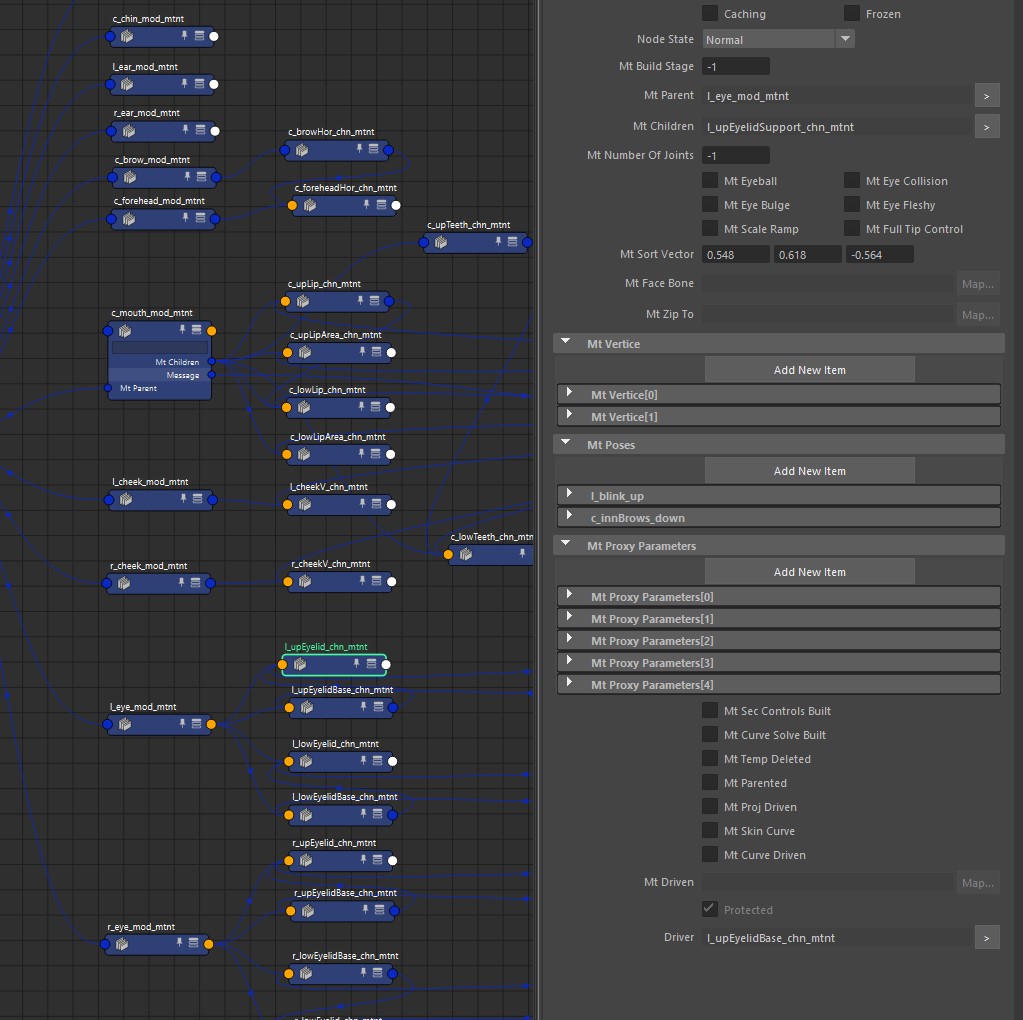
Attributes:
- mtBuildStage
Shows on what build stage this chain is now.
- mtParent
Although, there is no real hierarchy in facerig, parent-child relationship is needed to structure things for other features. Chains, sliders and facebones connect to modules, module connects to “faceRig_mtnt”.
- mtChildren
Same. Modules connect to chains and faceBones.
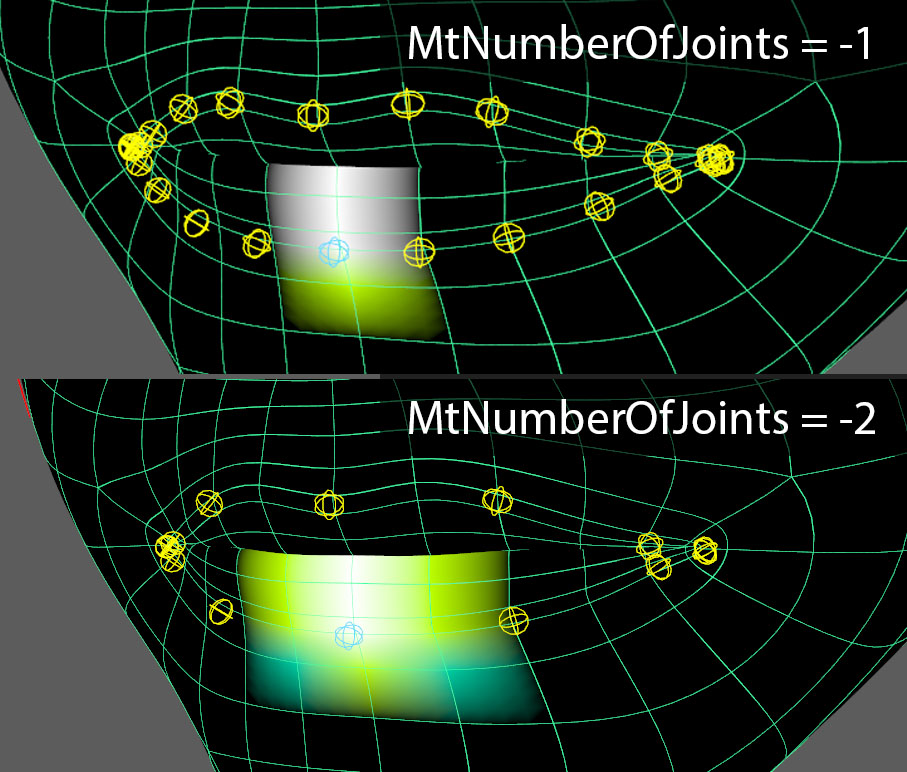
- mtNumberOfJoints
Number of joints in module/chain. If its a chain:
-1 means that every vertex in chain will get a joint, -2 for every second, etc.
If the number is >0, will do exact number of joints.
Note
Most likely AutoSkinning algorithm wont work if you set joints number manually.
- mtEyeball
Only if module. Shows if this module is an eyeball. Eyeballs have extra features like eyeBulge, lookat etc.
- mtEyeBulge
Only for module and Eyeball. Enables eyeBulge.
- mtEyeCollision
Only for module and Eyeball. Enables eyelidCollision.
- mtEyeFleshy
Only for module and Eyeball. Enables fleshyEye.
- mtVertice
Compound attribute. Has MtVertices attribute which is indices of vertices this chain/ module/ FaceBone is initialized on.
And MtVerticesMesh Attribute, which is the name of the mesh.
If MtCopySkin checkbox is checked, autoskinning algorithm won’t process this mesh and just copy skin weights from the first mesh in stack. Used on eyebrows or mustache, for example.
- mtOffsetVertices
For chain: Vertices where script will offset pivots of joints. Needed for zipping.
For eyeball module: Shows vertices of the eyeball.
- mtSortVector
Needed for AutoSkinning. Helps the algoritm to understand where is upper loop and where is lower for the first vertex it processes. Then it will find this vector itself. Rigging starts from -x -y end of chain to +x +y.
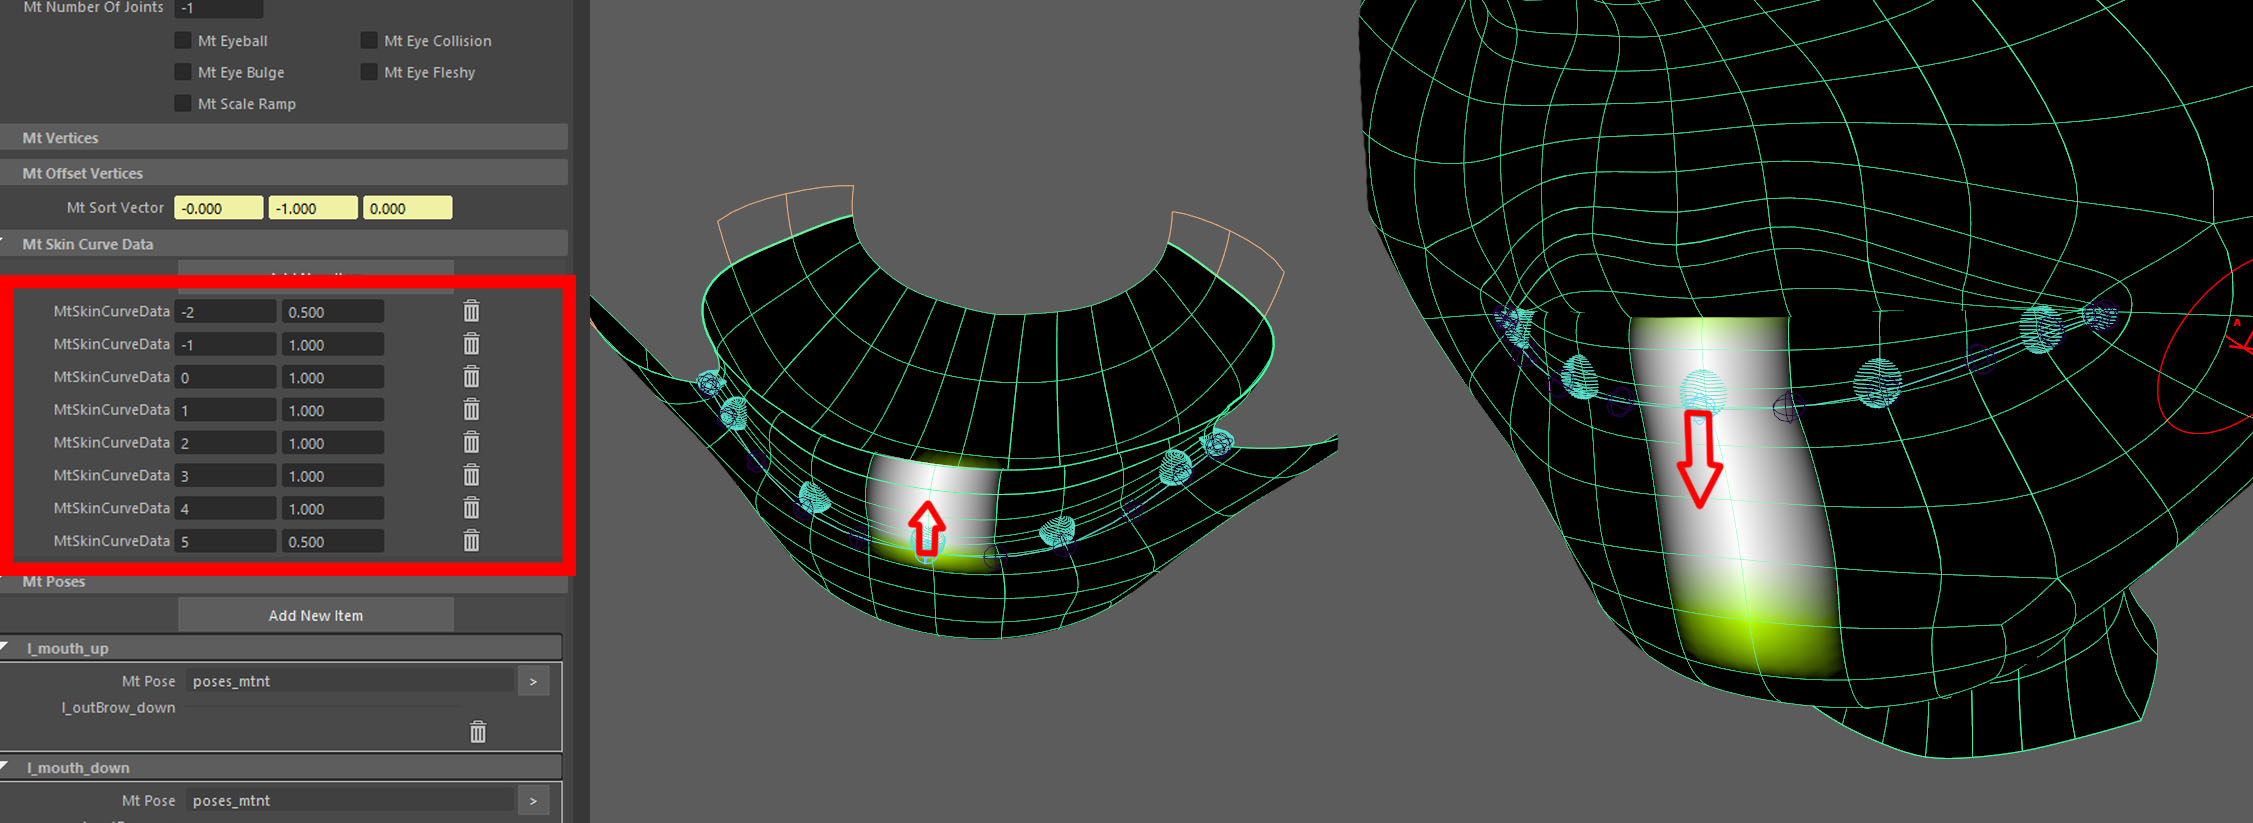
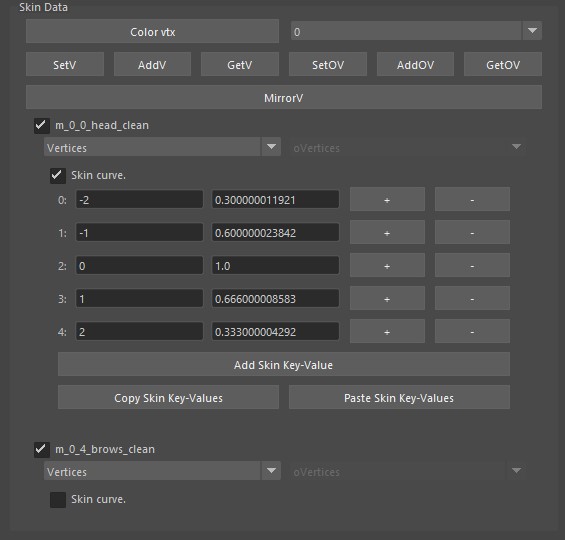
- mtSkinCurveData
Needed for AutoSkinning. Shows loop indices up and down from main chain loop and skinweights algorithm should apply to them.
- mtPoses
Links to face expressions. Read more in FaceExpressions section.
- mtProxyParameters
Stores facechain proxyes transform and FaceBone Weight. In worldspace.
- mtFaceBone
Link to FaceBone metanetwork.
- mtZipTo
Link to another chain to zip to. Needed for zipping.
- mtFullTipControl
Enables full rotation control for chains tip. More about FullTipControl
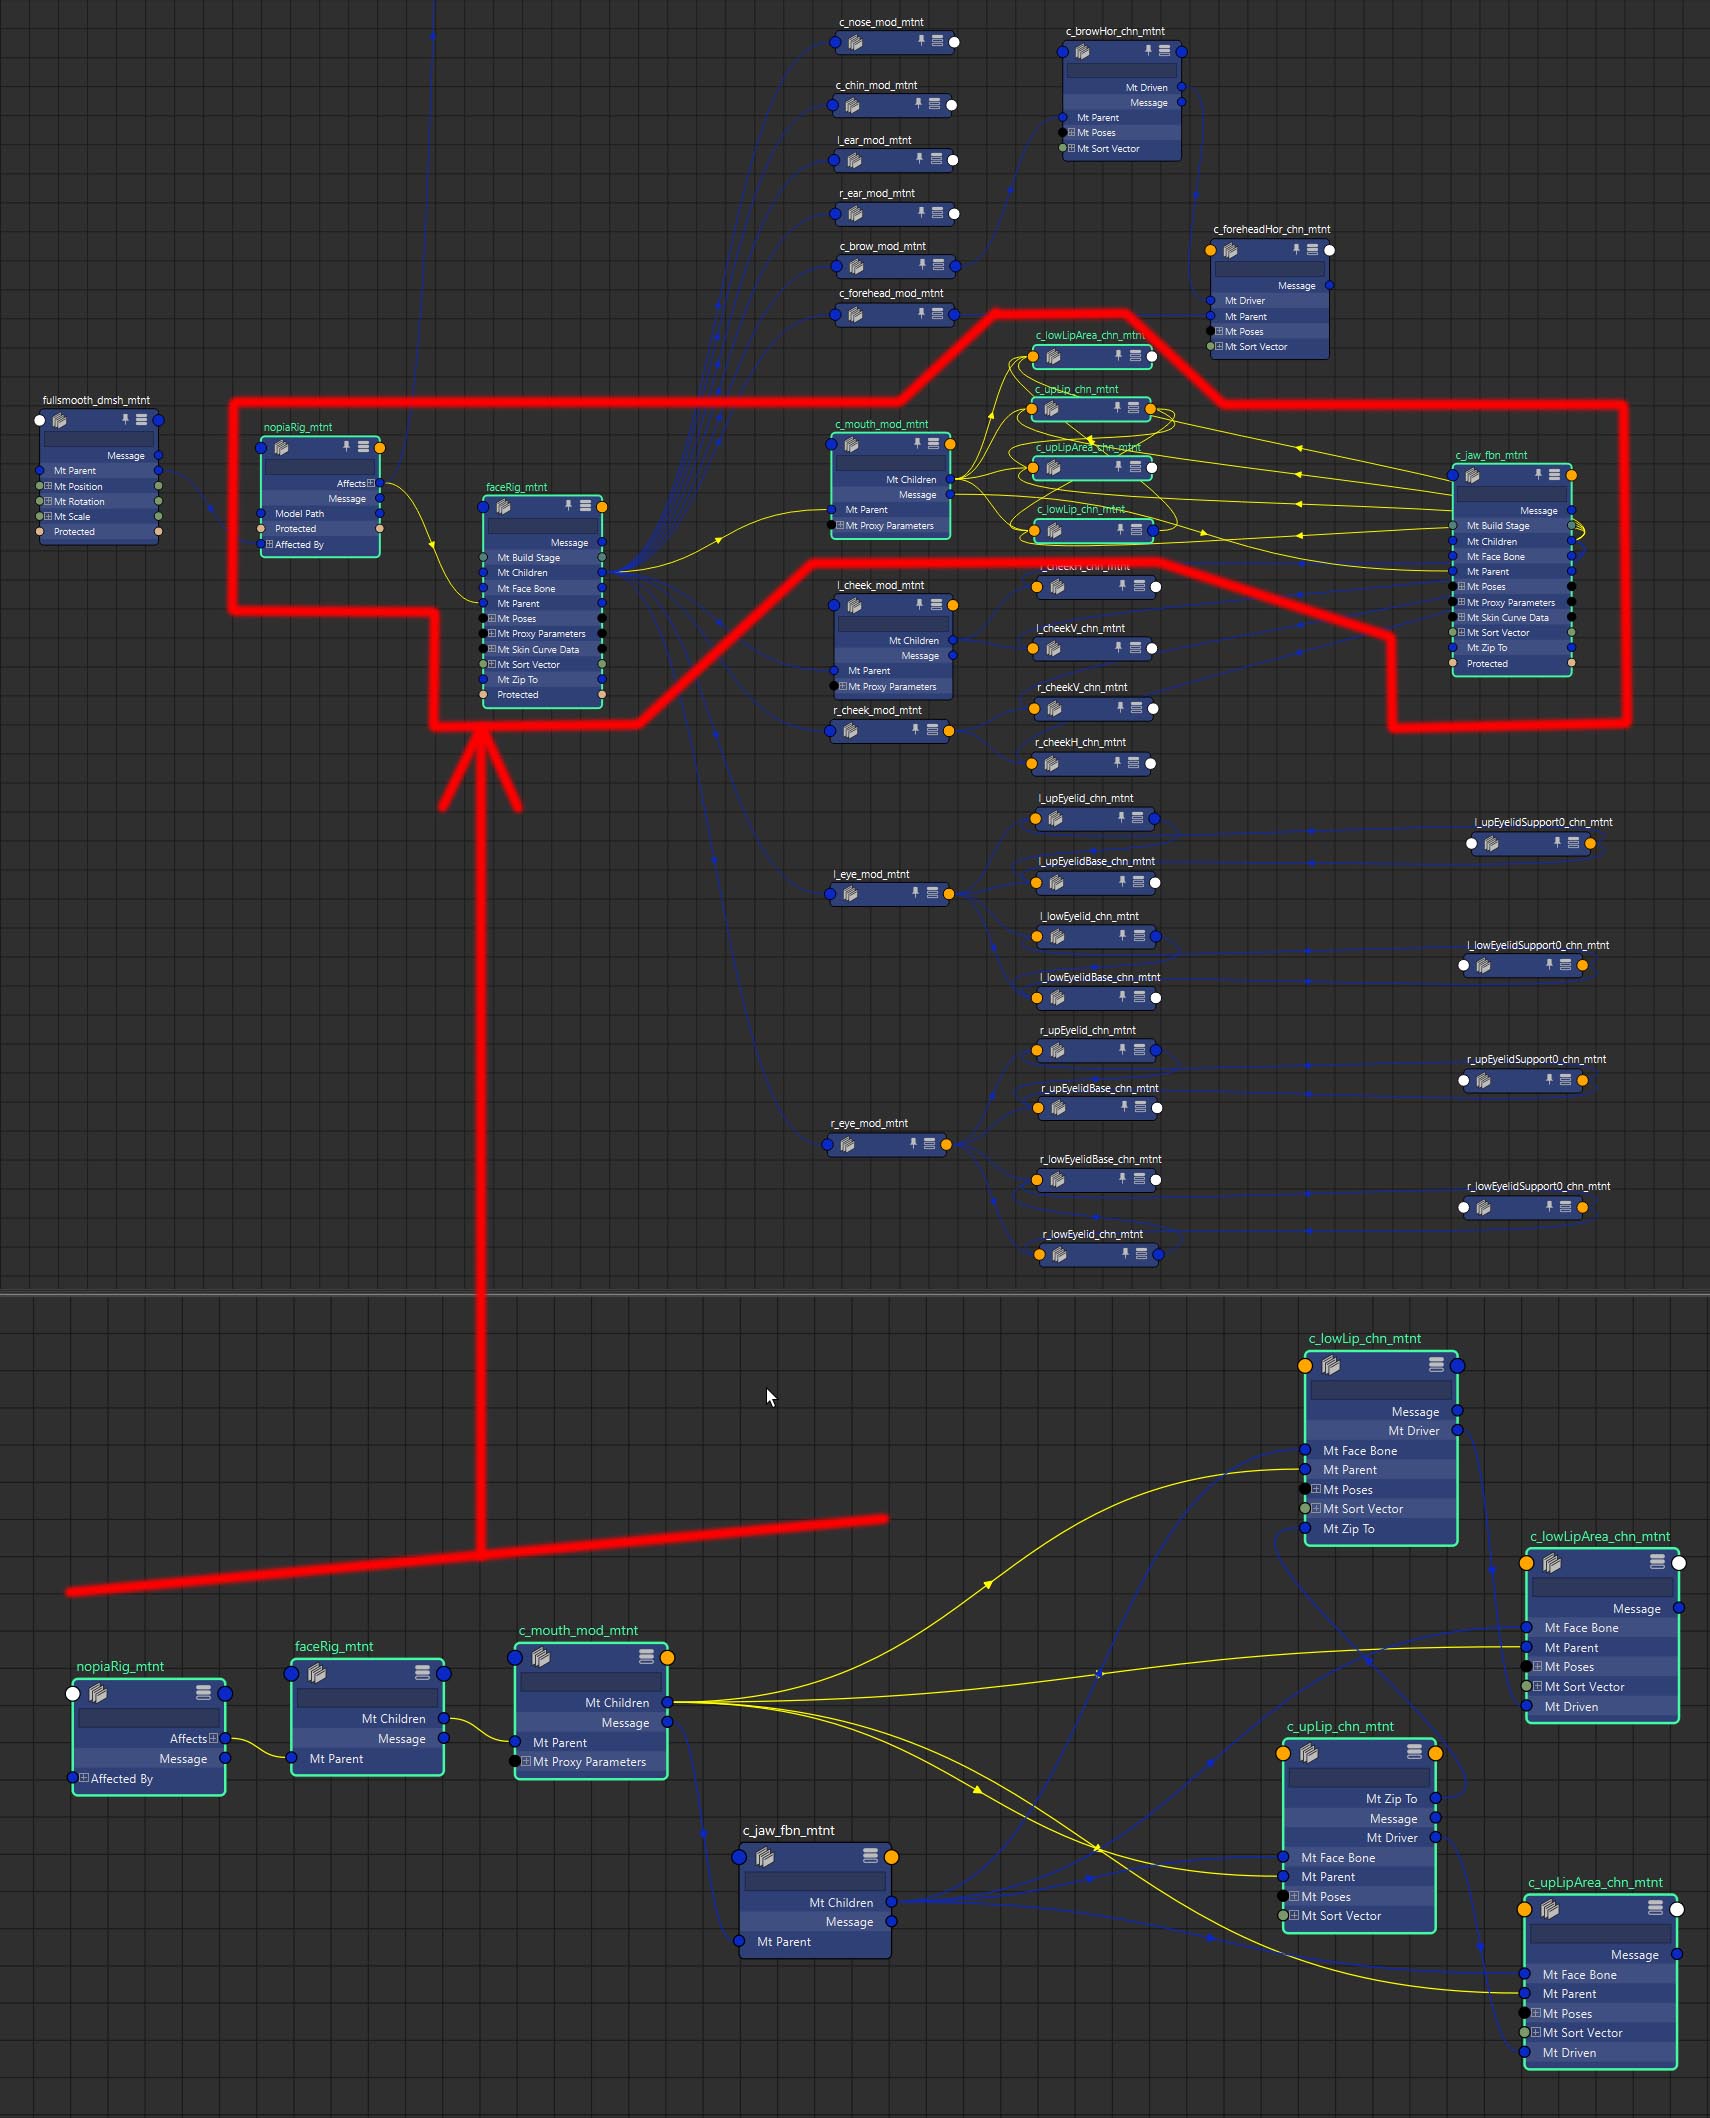
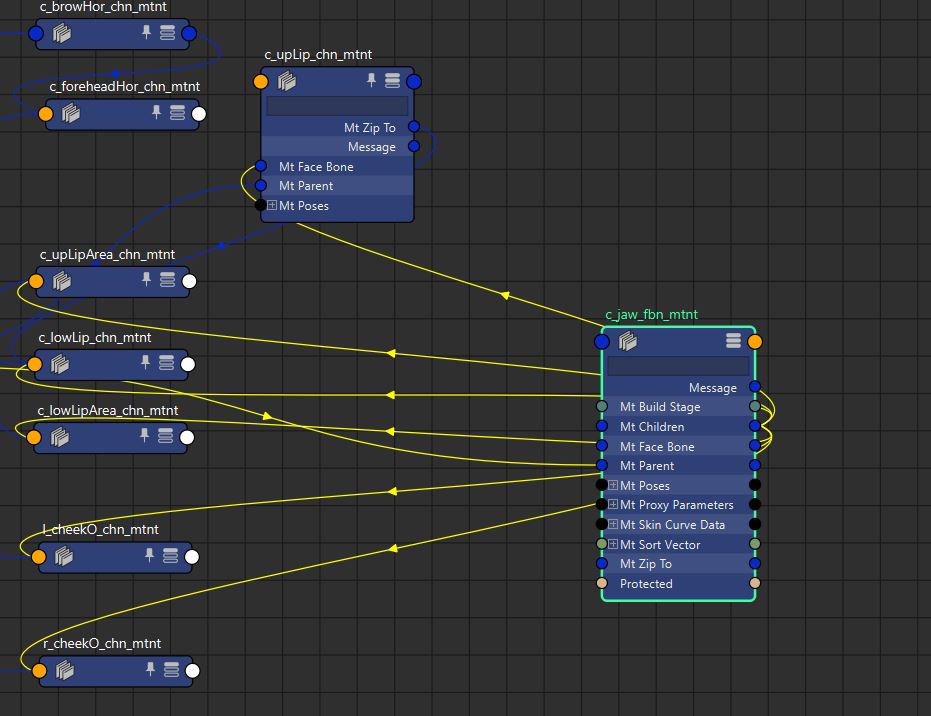
Editing Metanetwork.
Every metanode should be connected to others via “mtParent”,*”mtChildren”,”mtFaceBone”,”mtDriven”,”mtDriver”* and “mtZipTo” attributes all the way to the root “nopiaRig_mtnt”.
Before you build anything, you can validate your metanetwork by pressing “Validate Scene for face rig” and “Graph Validation”. Script will check how your nodes are connected and tell you if something is wrong. Usually.
Building a faceRig.
Stage 0.
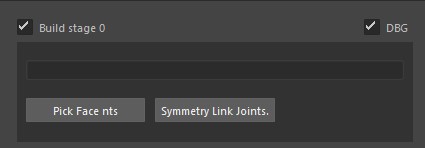
- Main Textfield
Face chains or modules rig will process. Helps to isolate rigging of some chains for deburring or step-by-step rigging.
- Set face networks
Adds selected meta networks to the main textfield.
- Link Joints
Links selected face proxy joints for symmetrical behaviour. Select joint on source side, then other joints in chain and press.
Note
You might need to reset your face networks, if you used preset or older rig. Otherwise face controls might appear in weird places. More on that here: Network Tab.
When your network is ready, you can start building it. First, you need to set vertices of chains and modules. Rig system then will use these vertices to create proxy curves and for AutoSkinning.
- Call a Set nt data UI. to set vertices by pressing “Set network data UI.” Button. Under network tab.
It will isolate select the meshes you need to pick vertices on.
Select network you want to add vertices to.
Select vertices.
Press SetV
Repeat for every face meta network you have. except for support_chains.
Note
Script merges all meshes from top to bottom of your “geom” group, so never reorder them after your vertices are set.
Note
Set vertices of inner eye of your model as offset vertices of eye module.
Note
Avoid long round chains. Like on gif below. It might twist the chain in places you don’t expect because of the way upvector is calculated along the chain. It is better to Split this chain in half.
When your vertices are set you can start placing your face modules.
- Clean all transform data from face modules. If you did not reset those before. Mind that modules can have only one transform.
( Not necessary, but your modules can appear somewhere you dont expect(where they were in previous rig)) Dont forget to set scale to (1.1.1) if you do this manually.
- Set a face module you want to build.
By selecting networks and pressing “Set Face nts” button. If you do not select anything, and system will build modules and chains together.
- System will place them automatically first. Then you can tweak positions.
Those positions are then stored automatically and reused when you rebuild your facerig.
Note
Eyes are placed automatically to the center of chosen offset vertices of eye modules, but you have to scale them manually.
Note
X axis of eye module should be aimed to sight direction.
Note
Don’t mind that joints don’t follow module controls, when you place them. Just contnue. Those will catch up after rebuild.
Then you should place proxyes for facechains.
- Set a face chain you want to build.
By selecting networks ans pressing “Set Face Networks” button. (if you wont select any rig will build all chains)
- Build your rig on stage 0.
(If you forgot to set the number of controls under “mtProxyParameters” section, just undo your build.)
Move face proxies where you want em. Curves should be as close to previously selected vertices as possible.
Repeat for every chain.
Here is how it should look.
Note
You can place modules after you placed chain proxies and vise-versa. At this stage they are not connected and its safe.
Stage 1.
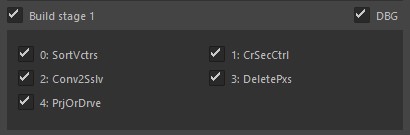
- CrSecCtrl
Creates secondary controls in in same place where your temp joints are.
- SortVctrs
Makes sort vectors for skinning (next stage). No need to tweak them now, just check if thouse appear.
- Conv2Sslv
If checktd, will convert your temp curves to curve solve custom nodes.
- PrjOrDrive
Parents chain to face module, or projects it on module’s surface or parents it to another chains(if its support chain)
- DeletePxs
Deletes old temporary proxies.
When all your proxies are in place, you should rig stage 1. On this stage rig will convert temporary curves to curveSolve custom nodes, place joints, create projections, create secondary face controllers. Rig it and check if everything is fine.
Warning
If you will try to undo this stage maya will most likely crash. So, save your scene before you do, so you can come back and change some attributes, if you forgot, for example, set number of joints.
Known issues on this stage: If your joints appeared are on the opposite side of the eye - check scale on module control’s offset. It might have double negative scales. Scale should be negative only on Z axis. Secondary controls might not affect your chains as you expect. This is temporary. They will be connected properly on stage 5.
Stage 2.
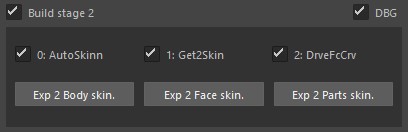
If everything is good with joints and controls, you can proceed to autoskinning stage (Stage 2) To setup autoskin you have to set MtSkinCurveData attribute on every chain. Modules are skinned differently, so you don’t have to touch that attribute on modules.
MtSkinCurveData attributes shows autoskin algorithm how many loops up and down from the main one it should skin. To set where up and down for a particular chain is, you need to build sort vectors on previous stage. Note that system only sorts first vertices, then it can tell where up and down is by checking connected vertices. So if your chain bends along its direction a lot, just set where up and down is only where it starts. (Check indices of your controls or proxy joints to see where it starts.)
Algorithm will search vertices that are close to chain joints and skin them as you’ve set. Note that if you have made 1 joint for each vertex, weights will be exactly that, if sth else, algorithm will try to blend between neighbour joints.
First skinning might take a while, then you can save it to json and there will be no need to go through this. Unless you change topology, ofcourse.
If you do it for the first time, we suggest you to skin chains one by one, so you can see the result faster and try different skin values.
Note
At this stage there is no need to tweak skin yourself. Not all influences are added yet.
Note
Remember, that if “Skin Curve” checkbox is unchecked, rig will try to copy skin from the top mesh in stack.
Known issues on this stage:
- No Joints error.
If rig complains that chain doesn’t have joints, but it does, try to roll back and rerig the face to this stage. Maya’s undo/redo can cause that.
Stage 3.
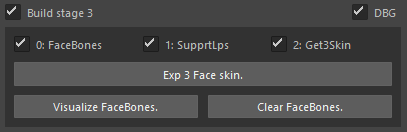
- FaceBones
Rig will create face bones if checked.
- SupprtLps
Builder will create support loops, if checked.
- Get3Skin
If checked, and skin file exists, builder will import skin weights related to this stage.
- Exp 3 Face Skin.
Exports this stage’s skin weights.
- Visualize FaceBones.
Builder will create 2 temporary joints, that represent facebone’s base and aim. Place those where you need facebone to be.
- Clear FaceBones.
Builder will delete 2 temporary joints, that represent facebone’s base and aim.
Face bones.
Face bone is a rig entity that drives face chains as parent and sits on the same skin level with face chain joints.
To create a facebone you need to create its metanetwork, name it with “_fbn_” suffix and connect to children. MtFaceBone attribute of children connects to MtChildren attribute of faceBone.
Then you set its vertices as before and rig stage 3 with FaceBones checked
Support loops.
Support chains help to drive skin more precisely. For example, on eyes when skin penetrates eyeballs on blinking you want to create these chains to push vertices away from the eyeball. Support chains are driven by other 2 face chains.
To create support chains you need to create meta nodes that represent em. Add “Support” before affix, so builder knows its a support chain. Then connect MtChildren attribute of parent to “MtParent” of support chain.
Builder will create a support chain for every loop between parent chains. Support loops will take skin weights from parents, so dont forget to skin those “between loops” on stage 2.
Stage 4.
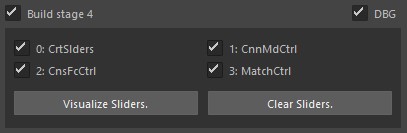
- CrtSliders
If checked, Rig will create sliders. E.g. Main face expression controls.
- CnnMdCtrl
If checked, Rig will connect module controls to their joints.
- CnsFcCtrl
If checked, Rig will connect face controls to body rig. ( To head, for example. Rig tries to find em automatically. Default order is: c_headLattice, c_head, c_neck, c_spine. Rigger will pick one of these.
- MatchCtrl
Will match secondary face control’s space to space of locators that drive face curves.
Create sliders
Read more about creating sliders in Face_poses section. You should plan your face controls and expressions at this stage already.
Connect Mod controls
Blenshape skin merge
Merges all skins onto one mesh. This is temporary and very slow approach. Use only to preview your skins.
Connect Face controls.
Connects main face controls and module controls to body rig. Note that secondary face controls are not attached yet.
Match Face controls spaces
Stage 5.
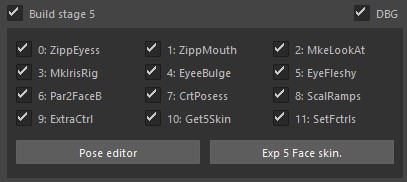
- ZippEyess
If checked, Rig will add eyelidCollision. Will be replaced with proper eye collision later.
- ZippMouth
If checked, Rig will create lip_zipping.
- MkeLookAt
If checked, Rig will add eye lookAt_controls.
- MkIrisRig
Will add iris-pupil_rig to lookats. Works only with MkeLookAt flag.
- EyeeBulge
Will add eye_bulging.
- EyeFleshy_
Will add fleshy_eyes. This feature will be reworked.
- Par2FaceB
Will Parent secondary face controls to FaceBone.
- CrtPosess
Will create face expressions rig.
- ScalRamps
Will make picked face chains scalable. To pick a chain enable MtScaleRamp checkbox attribute on chain’s meta node.
- ExtraCtrl
Will match secondary face control’s space to space of locators that drive face curves. See driven_chains.
- Get5Skin
Will try to import skin for stage 5. DOes nothing if skin is not exported.
- SetFctrl
Will try to import skin for stage 5. DOes nothing if skin is not exported.
In detail.
Eye Bulge.
Eye bulge is essentially a sphere parented to eye joint. This sphere pushes eyelid joints out. Eye bulge controlling attributes are under extra attributes section on eye slider.
- Bulge Radius
Radius of pushing sphere.
- Bulge push
Determines how far this bulge sphere is pushed from eye center.
- Bulge mult
Effect multiplier.
LookAt setup.
Has a main controller that controls all eyes. Has follow… Attributes to change spaces. Also has a controller for each eye. These controllers can be scaled to change pupil and iris size, iris-pupil_rig was enabled.
Iris-pupil rig.
Joint based eye rig. Size of pupil and iris are controlled by scale and push values of eye joints.
If your iris and pupil dont scale properly, try to tweak Iris Pos and Pupil pos attributes on lookat controller.
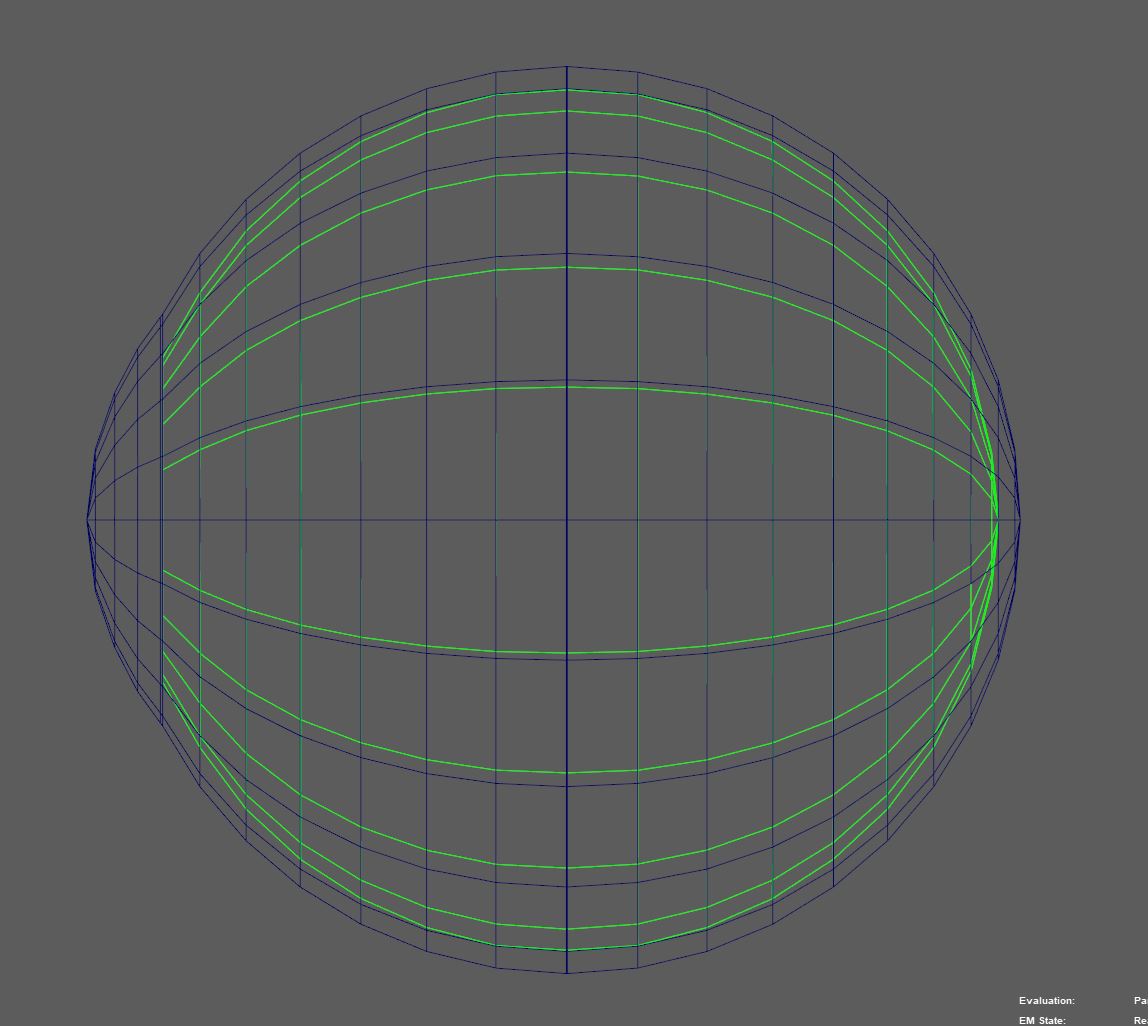
If you have two-layered eye, then inner eye iris area should be flat and look like on screenshot below. On flat area: one support loop and ine middle loop to scale the pupil.
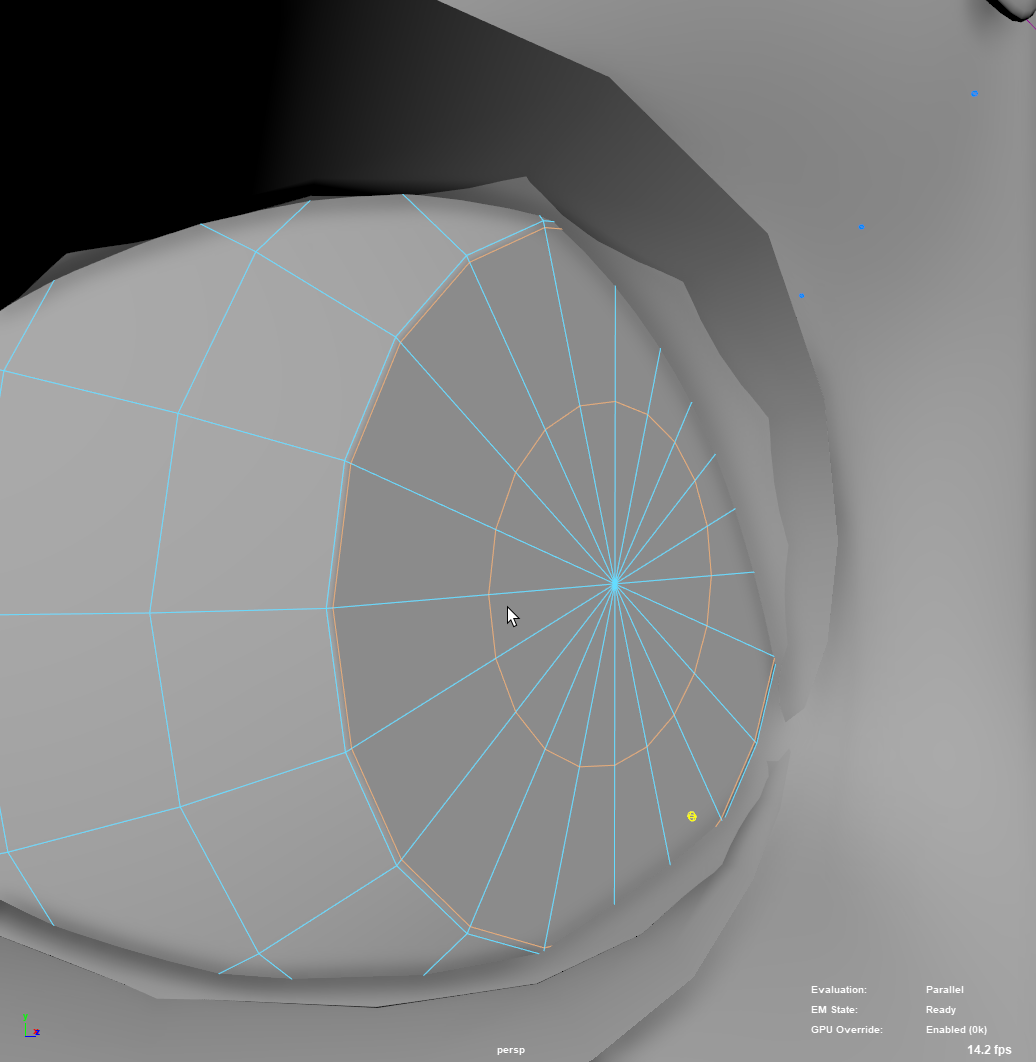
Outer eye can be a clean sphere or have bulge on iris. Bulge has to start like this:
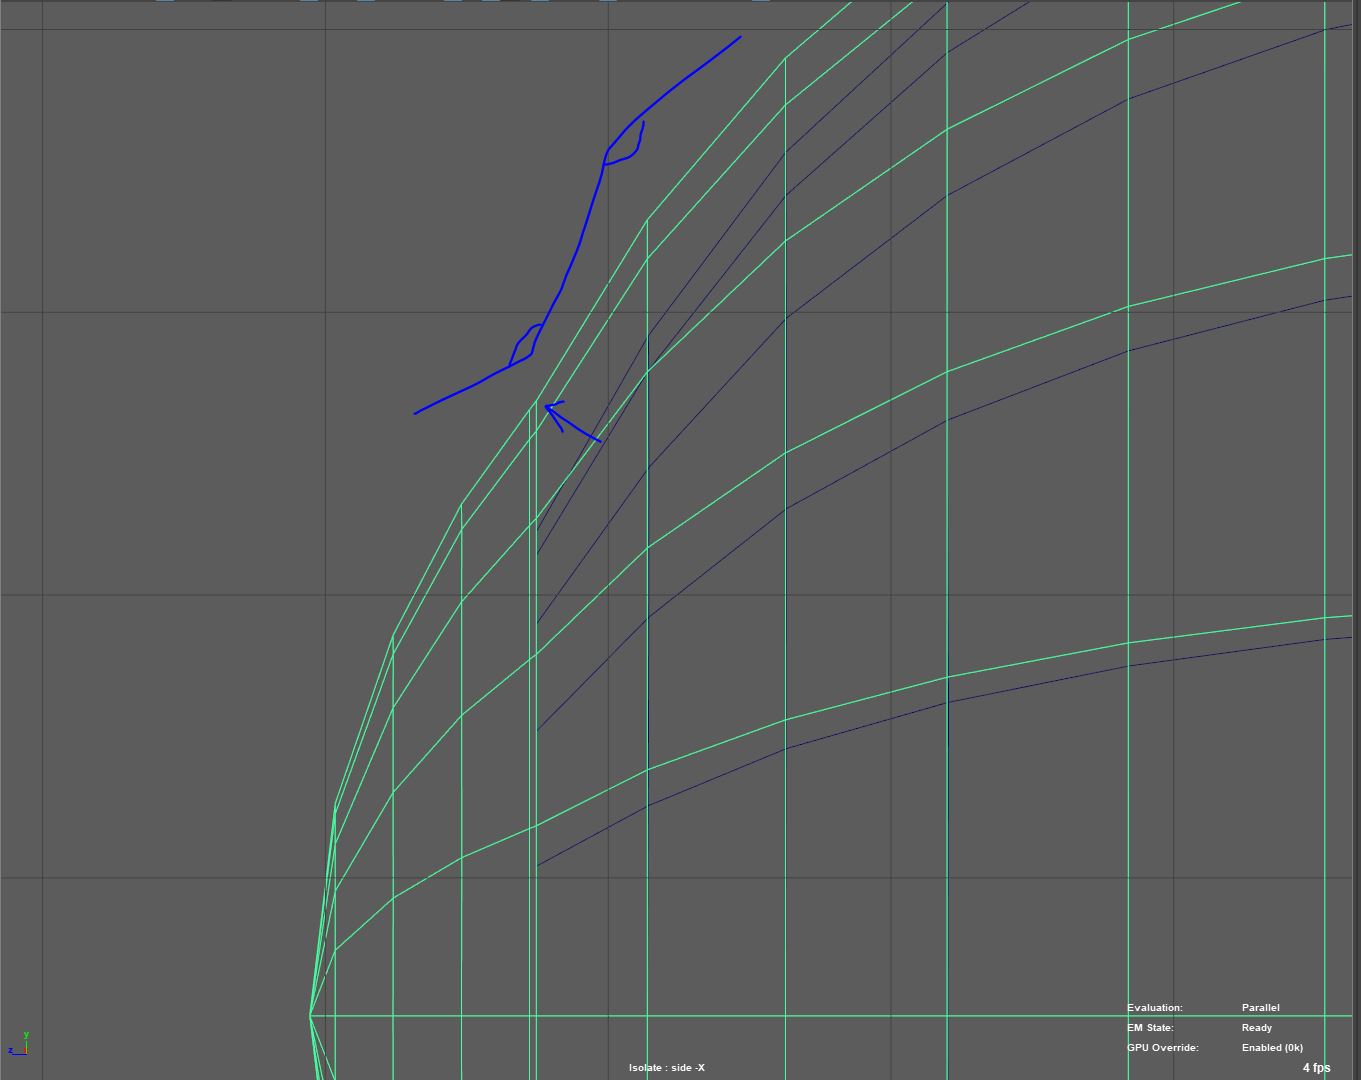
This way rig knows where bulge starts and can rig accordingly. Don’t do this agle flat. Curvature should reverse here. At least a tiny bit.
Bulge has to be spherical. Use nurbs sphere to make it this way.
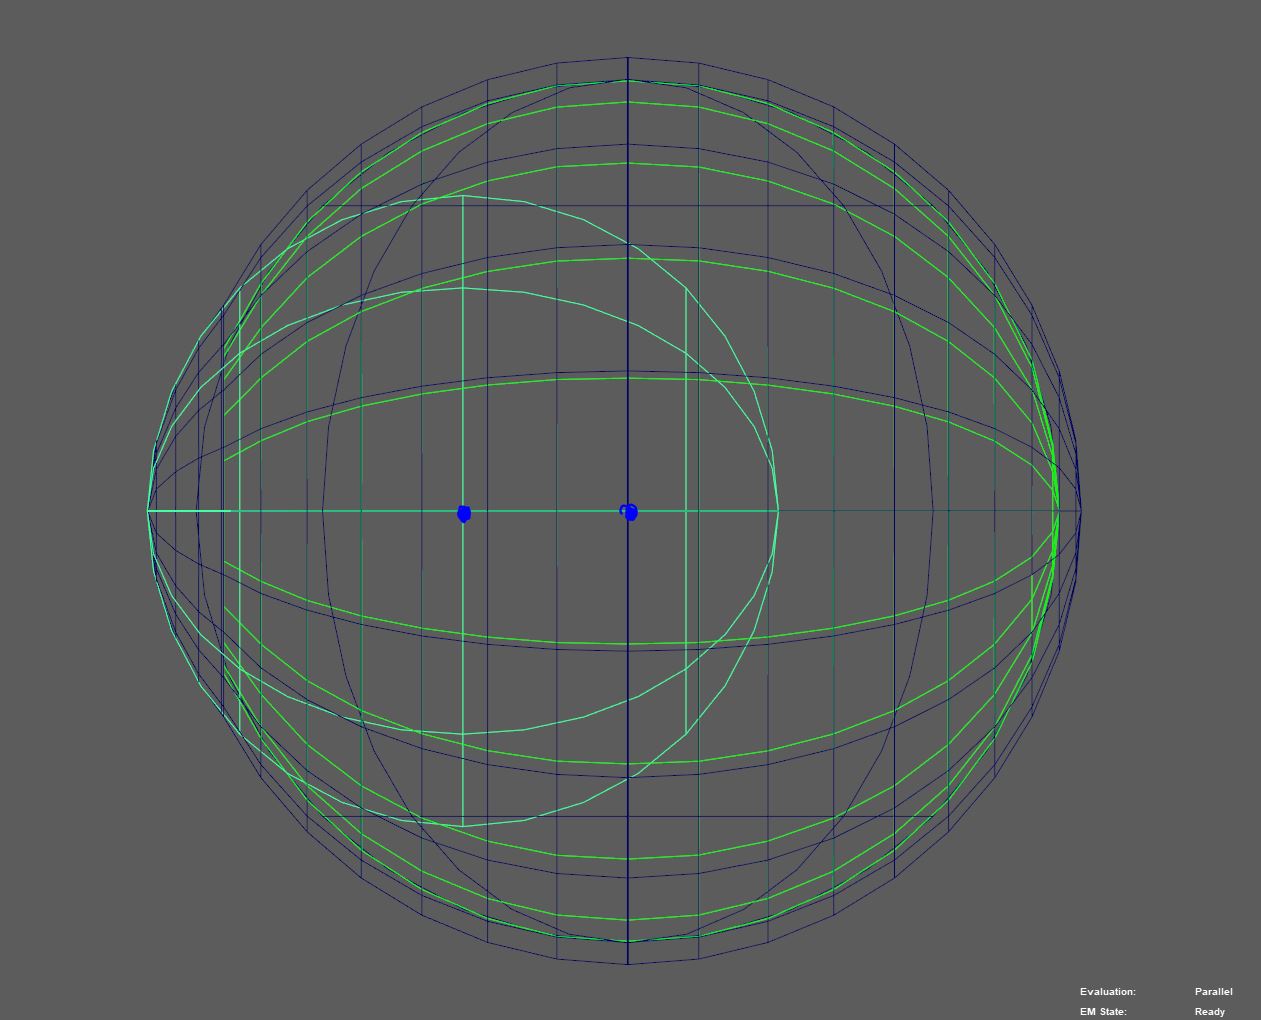
Outer and inner eye’s loops should be on the same Z-axis values. This way rig will produce less joints and the result will look beter. Do do that you can first scale inner eye as you like and then use nurbs sphere as a live surface to align loops.
Note
Currently eyeballs should be aligned to Z axis for this to work.
Eyelids Collision
Warning
Doen’t work yet.
Fleshy eyes setup
Essentially this is a slightly offsetted joint that inherits a small portion of eye rotation, making the whole eye move slightly. Hack. This should trigger eyelid poses. Will be fixed in following versions. To control how far this joint is from normal pivot, you can tweak Fleshy Push attribute. To control how much rotation this joint inherits, you can tweak Fleshy Mult attribute. You can find those attributes under eye slider. In Attribute editor. Use python patch file to store these values. Currently rig does not store these automatically.
Full Tip Control.
Normally, face chains only support x axis rotation. This checkbox enables Z and Y rotation.
Zipping chains.
To setup zipping you should connect MtZipTo attributes of two meta networks.
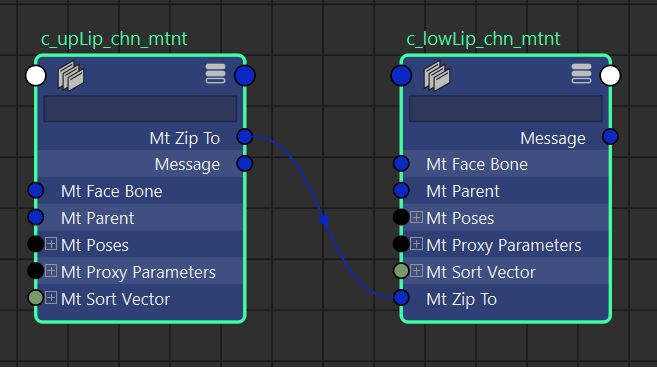
Also, zipping needs offset vertices to be set-up in order to work. Feature algorithm will move skinned joints to positions of picked offsets and parent them under old pivots. So chain can behave as before, but also will be able to zip along offset vertices chain.
If your normal joints are in, say, geometrical center of lips, offset vertices should be on the closest to other side lip’s edge.
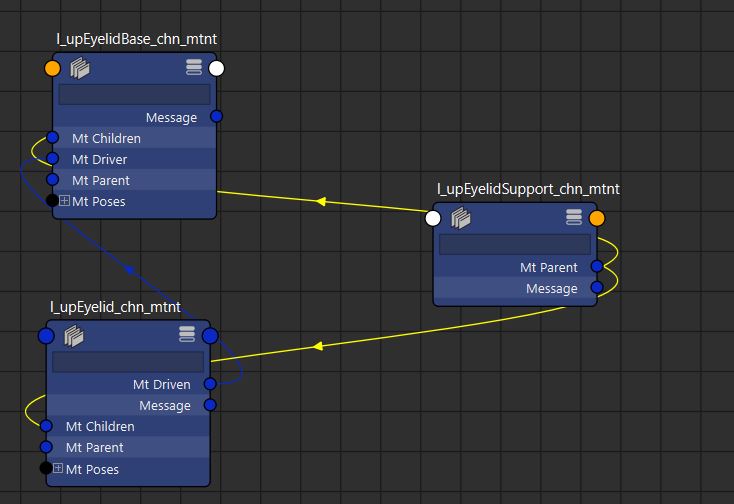
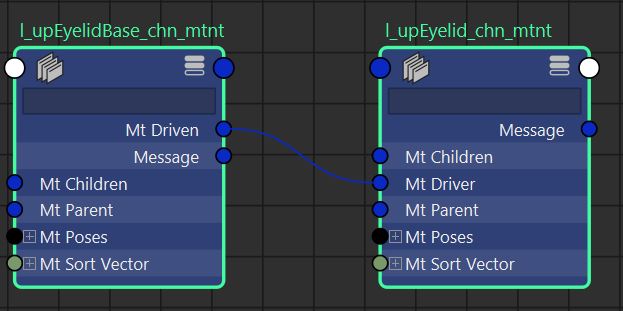
Driven face chains.
To setup driven chains, you need to connect MtDriven attribute of one chain to MtDriver parameter of second chain. Sedond chain will be driven by first. By default drive weight equals 0.5 on every chain controller. You can control that value by tweaking DriveMultiplier parameter on dirver’s chain controls.
Face Expressions
First you need to setup your fase expression network, or use existing one. Open face expression setup UI by clicking Pose Editor button.
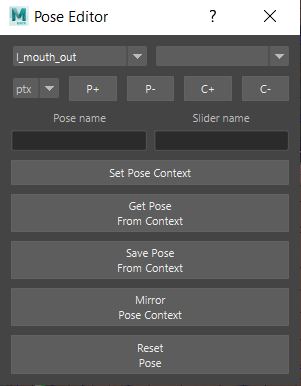
First we need to create a slider. Start by selecting parent module meta network and typing a pose name and slider name in UI’s textfield. Also pick controlling attribute in combobox.
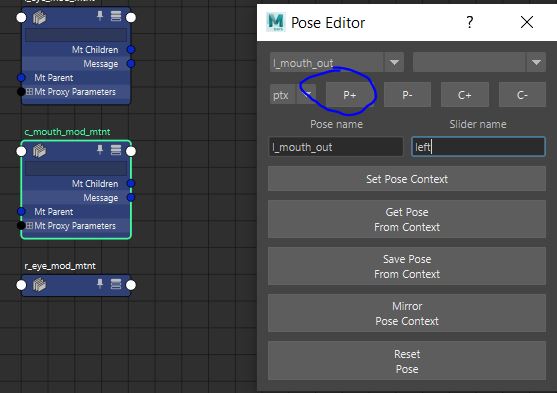
Click P+ (add pose). Here is what should happen:

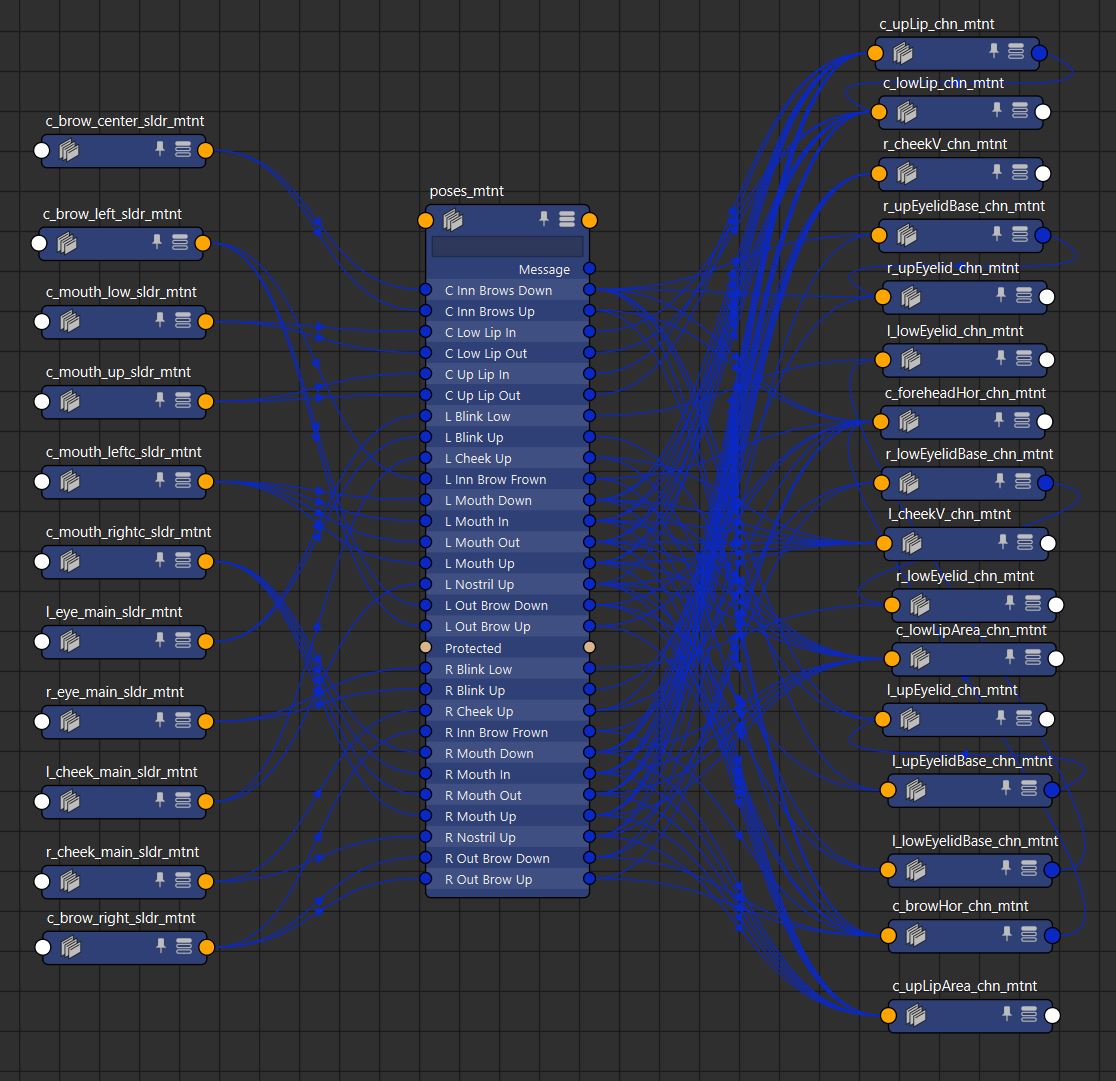
Slider network is created and connected to “poses_mtnt” netwdork.
Now we need to specify chains that will be affected by this pose. For that, select meta chains and press C+ (add chains)
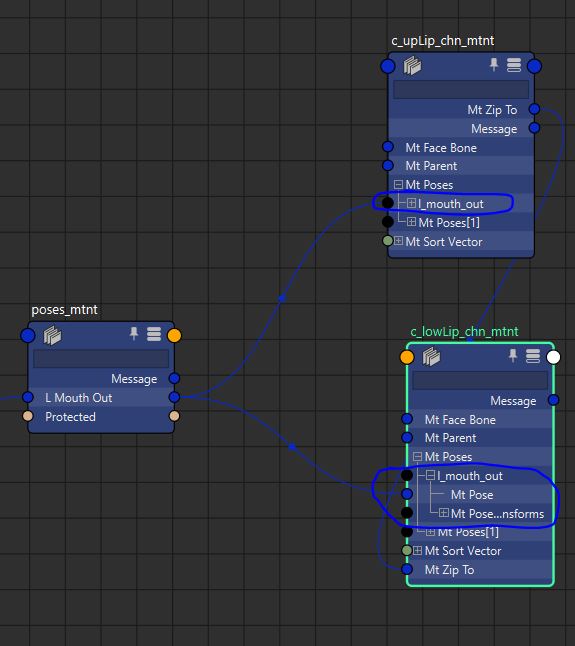
In the end it should look like this.
Then we rig stage 5, where all face expressions are really created. Here we can tweak face poses.
Note
At this stage you cant add or remove influenced chains.
To do that we pick a pose from PoseEditor(Left combobox), then press Set pose context. This will hide all unnecessary controls.
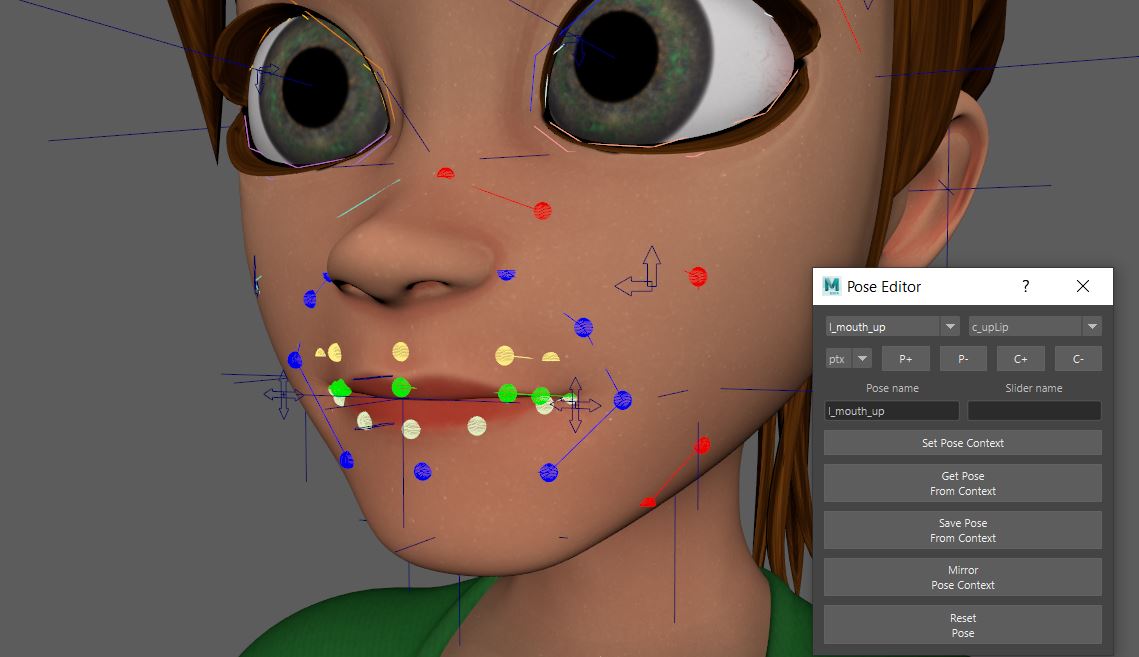
Now we move these controls where we need them to be when pose is triggered and press Save pose from context.
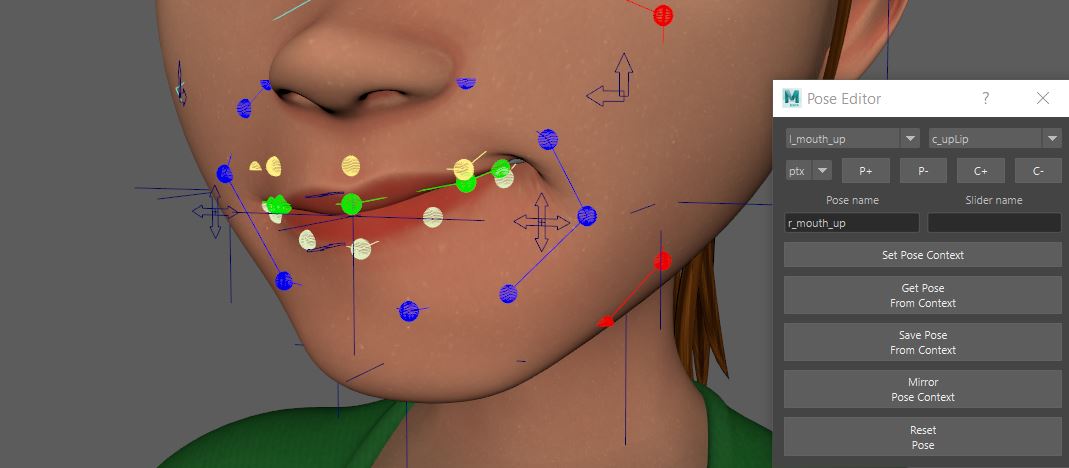
To mirror pose to the other side press Mirror pose context
Then we press Reset pose And continue with another pose.
To unhide all controls type “reset” to pose textfield and press Set Pose Context.