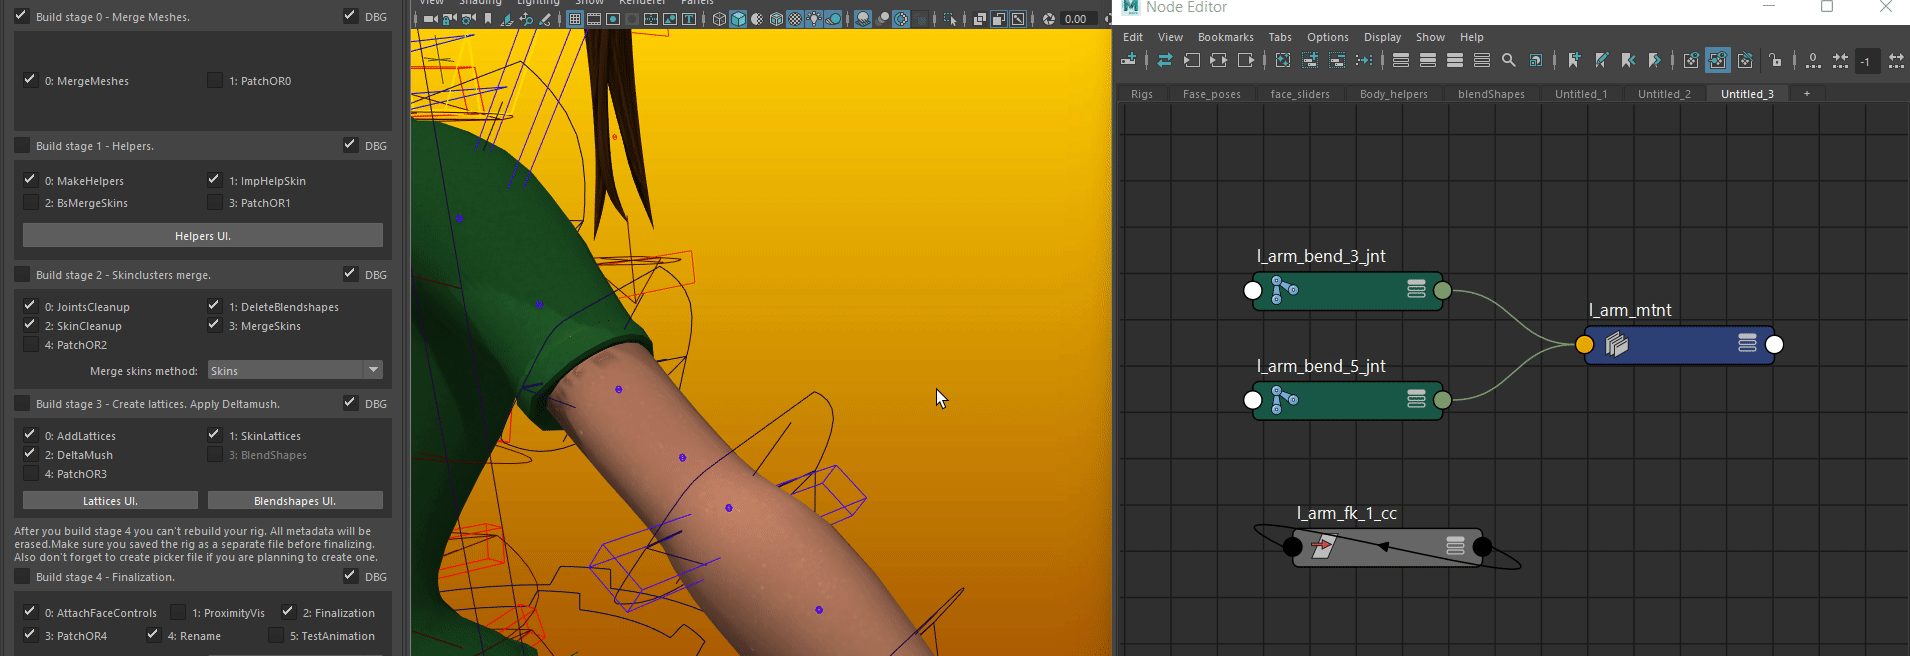
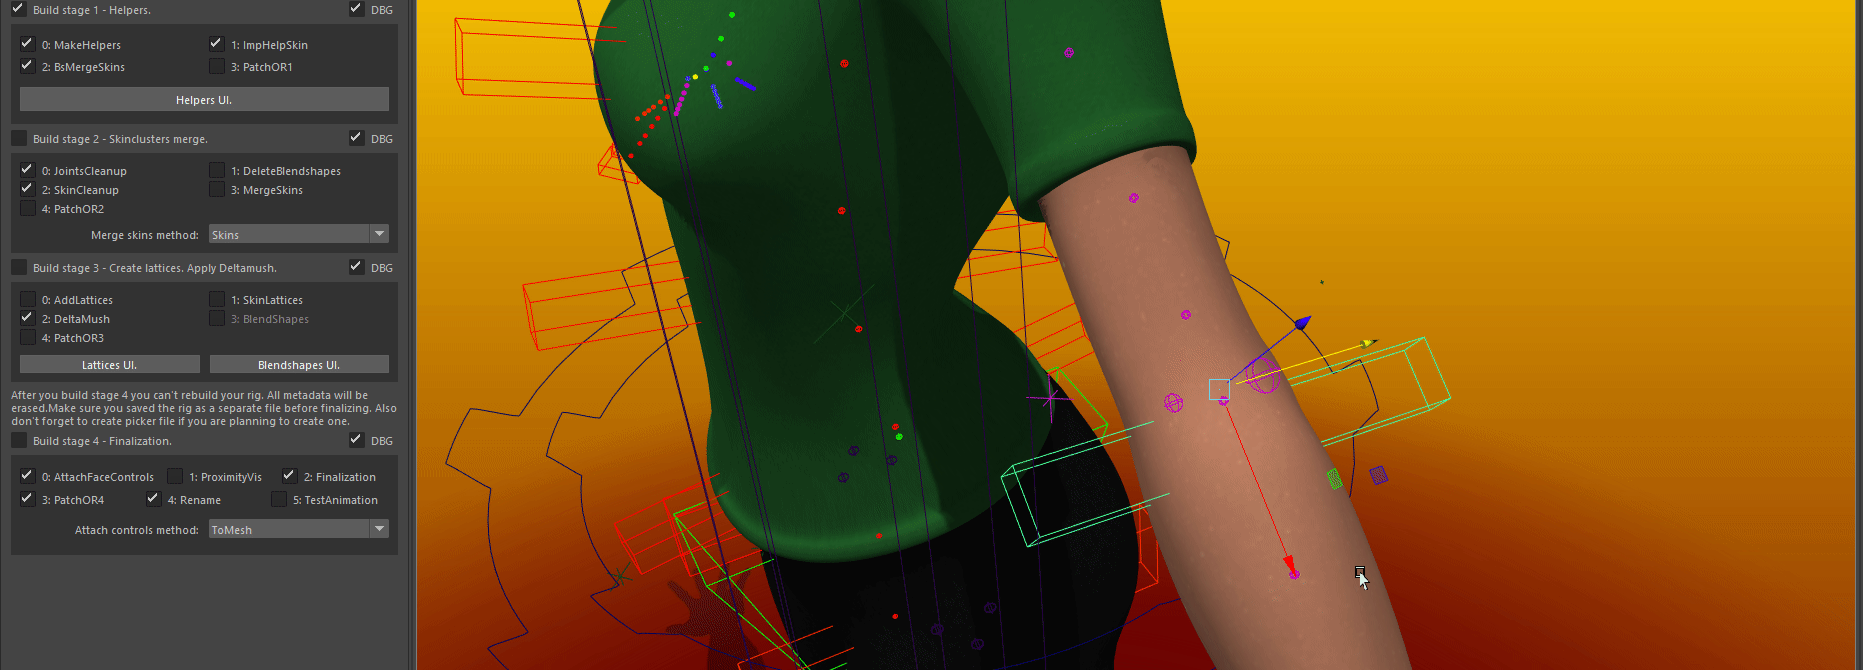
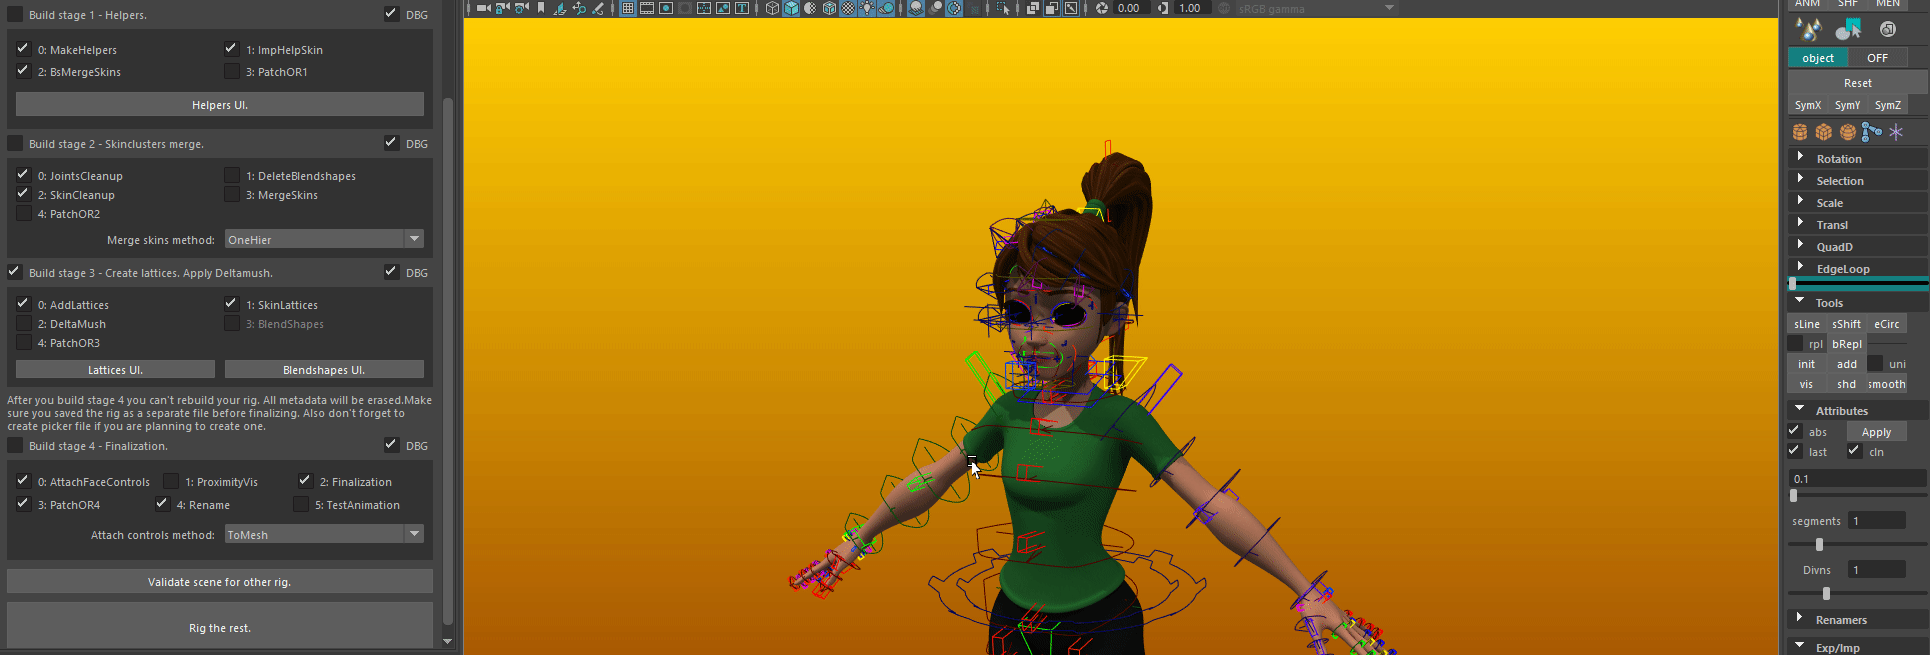
Rig Finalization.
Here we will add some extra features like correcctives, lattices and deltamush. And finalize our rig.
Stage 0. Mesh Merging.
- Merge meshes
If your original mesh consists of multiple pieces, at this stage rig will merge everything to one mesh.
- PatchOR0
If you need some custom changes made to your rig at this stage, you can use this. From python file patch.py it will run a function named run_o_0. Patches.
Stage 1. Helpers.
- Make helpers
If checked, rig builder will create helper joints. Here you can read more on helpers setup.
- ImpHelpSkin
If checked, rig builder will try to import helpers skin if such exists.
- BsMergeSkins
Will chain all skins in blendshape for your helpers visualization.
- PatchOR1
If you need some custom changes made to your rig at this stage, you can use this. From python file patch.py it will run a function named run_o_1. Patches.
- Helpers UI
Calls a UI that will help you to manage your helper joints and corrective blendshapes.
Stage 2. Skin merging.
- Joints cleanup
Replaces all joints that are not involved in deformation with empty transforms.
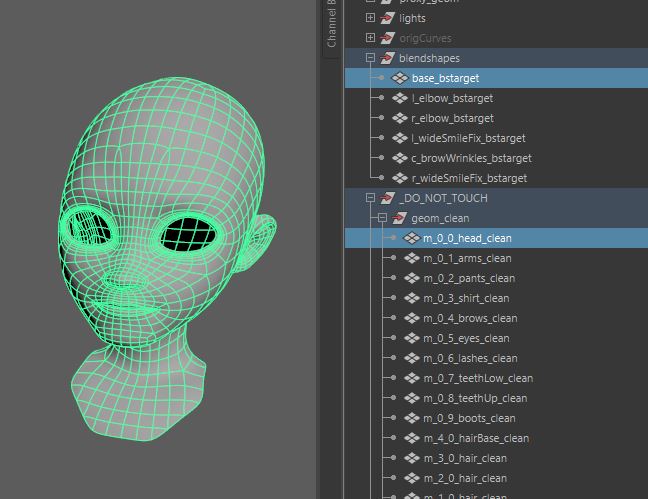
- Delete blendshapes
This will delete all unused blendshape deformers.
- Skin cleanup
Will reskin all skinclusters in scene. This will delete all unused trash maya created and increase performance slightly.
- Merge skins
This will merge your skins onto one mesh. Type of merge you can choose in combobox. Skin - Will add apply all existing skinclusters onto one mesh. Usually the one with facerig chains. Blendshape - Will chain deformations via blendshape. Good old method, but GPU acceleration won’t work here. One hierrarchy - Merges all skinsclusters into one. Used for game engine compatibility. Some features(Lattices, Deltamush) wont work in engine.
- PatchOR2
If you need some custom changes made to your rig at this stage, you can use this. From python file patch.py it will run a function named run_o_2. Patches.
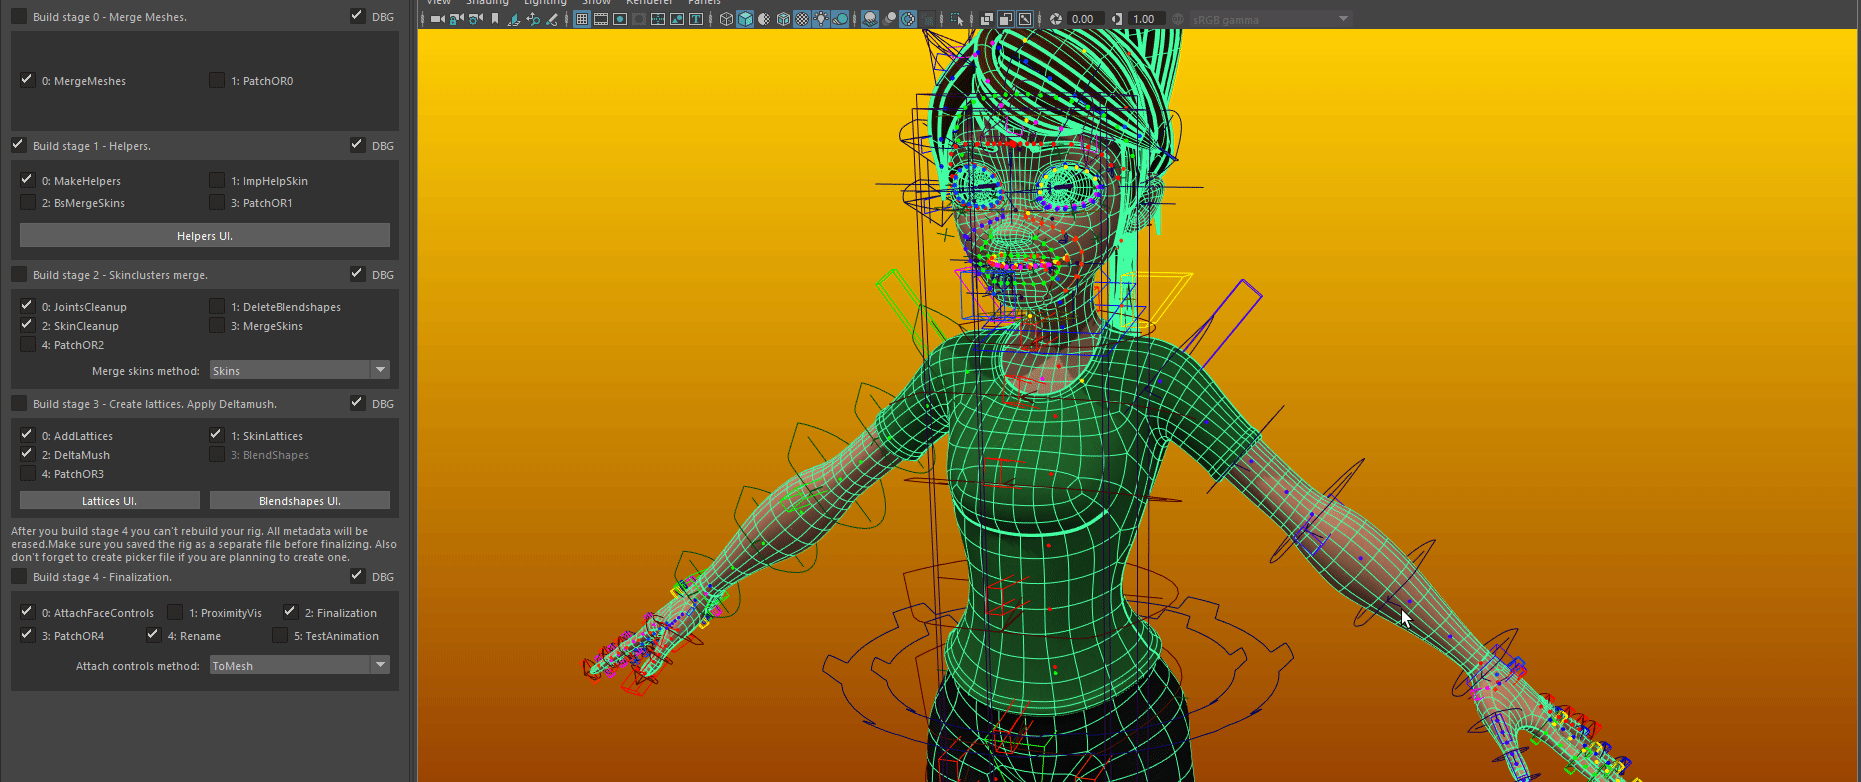
Stage 3. Lattices, Deltamush , Blendshapes.
- AddLattices
This wil add lattices. More on creating lattices read here.
- Skin Lattice
This will connect lattices to their controls.
- Deltamush
This will apply deltamush to your mesh. Read more on deltamush here.
- Blendshapes
Will add corrective_blendshapes.
Stage 4. Finalization.
Warning
After you build stage 4 you can’t rebuild your rig. All metadata will be erased. Make sure you saved the rig as a separate file before finalizing.If you are planning to add a picker to your rig, skip this part for now. Save your rig and check picker manual first.
- Attach face controls
Will attach_face_controls to face. Pick a method with lower combobox.
- Patch
Patches your rig with your custom script before finalization.
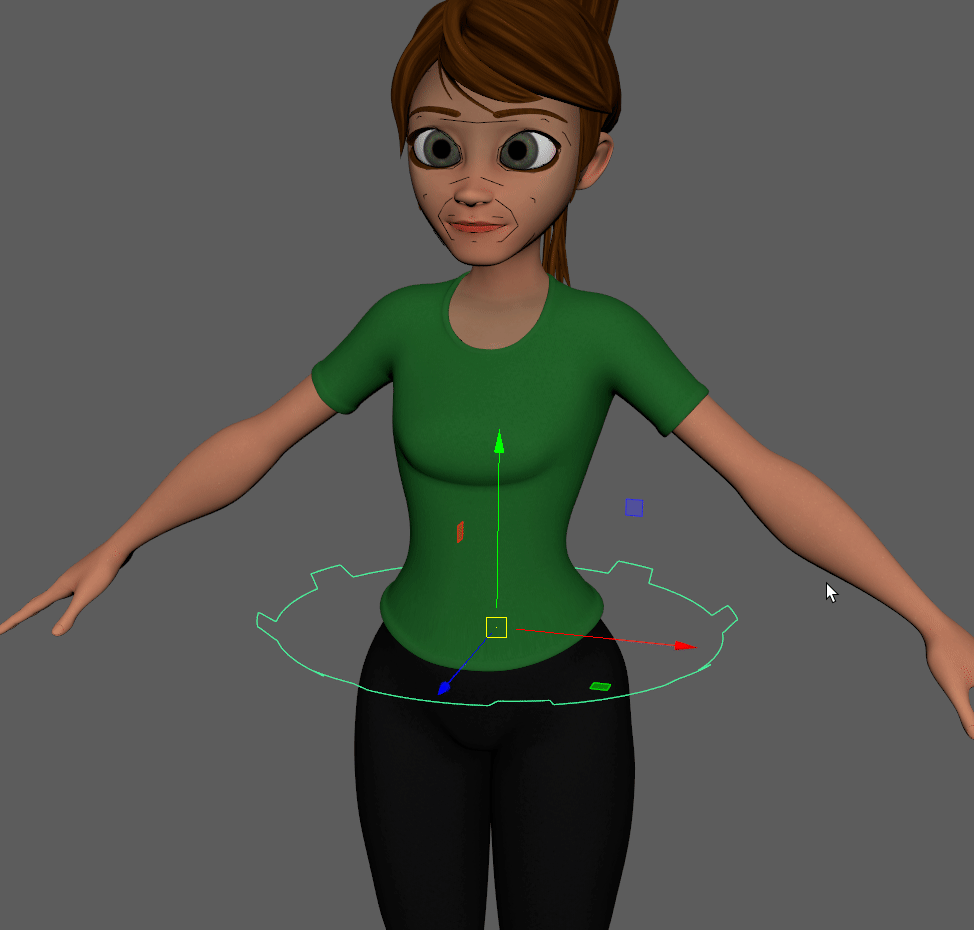
- Proximity vis
Will add proxomity_visibility feature to all controllers.
- Finalization
Will finalize the rig. Delete all unneeded nodes and connections. Reparent things. More on it here: finalization.
- Export Attr Values
Will Export all custom attributes values to a JSON file for later use. IK/FK switch, Eye Bulge Radius, Spline CV toggle, etc.
In Detail
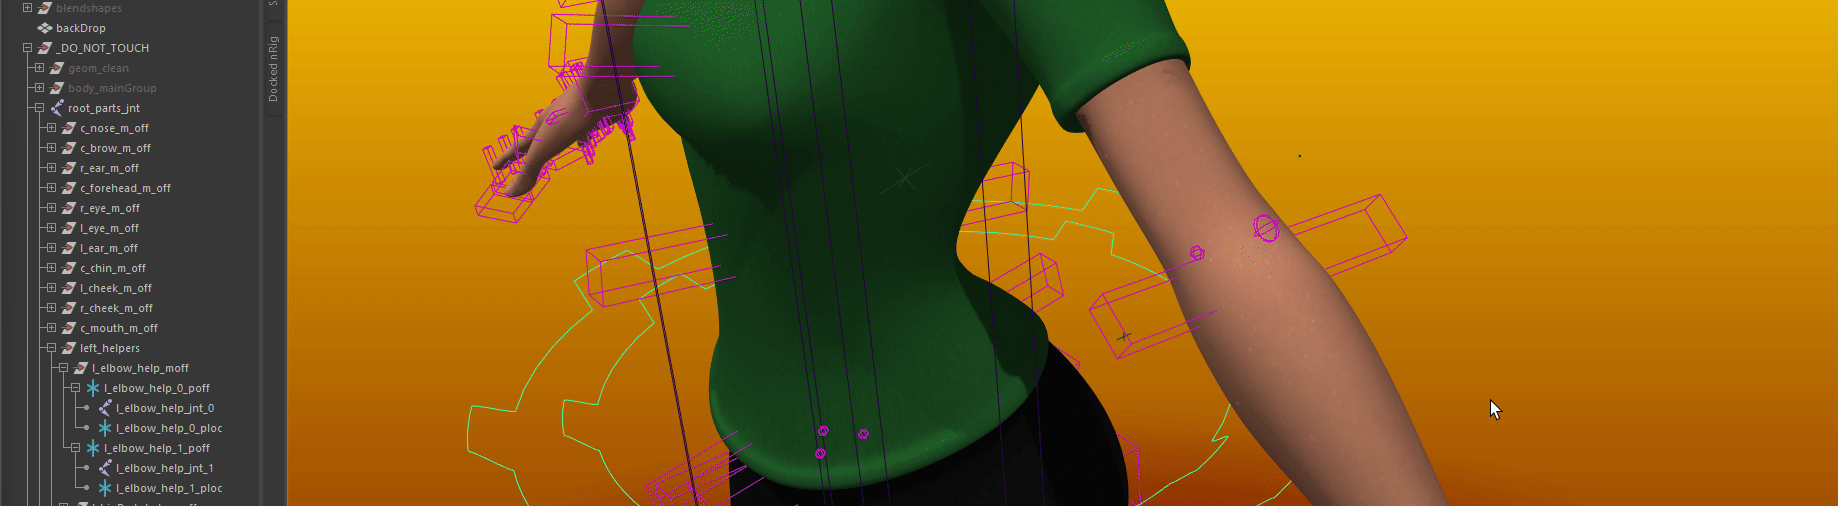
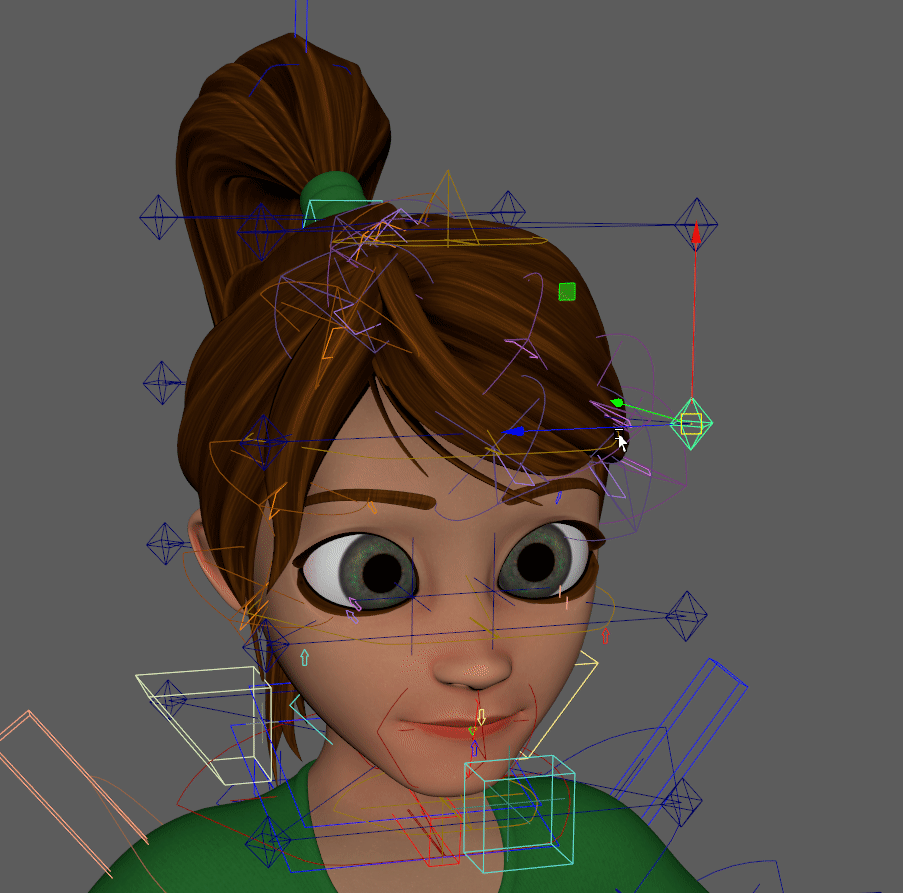
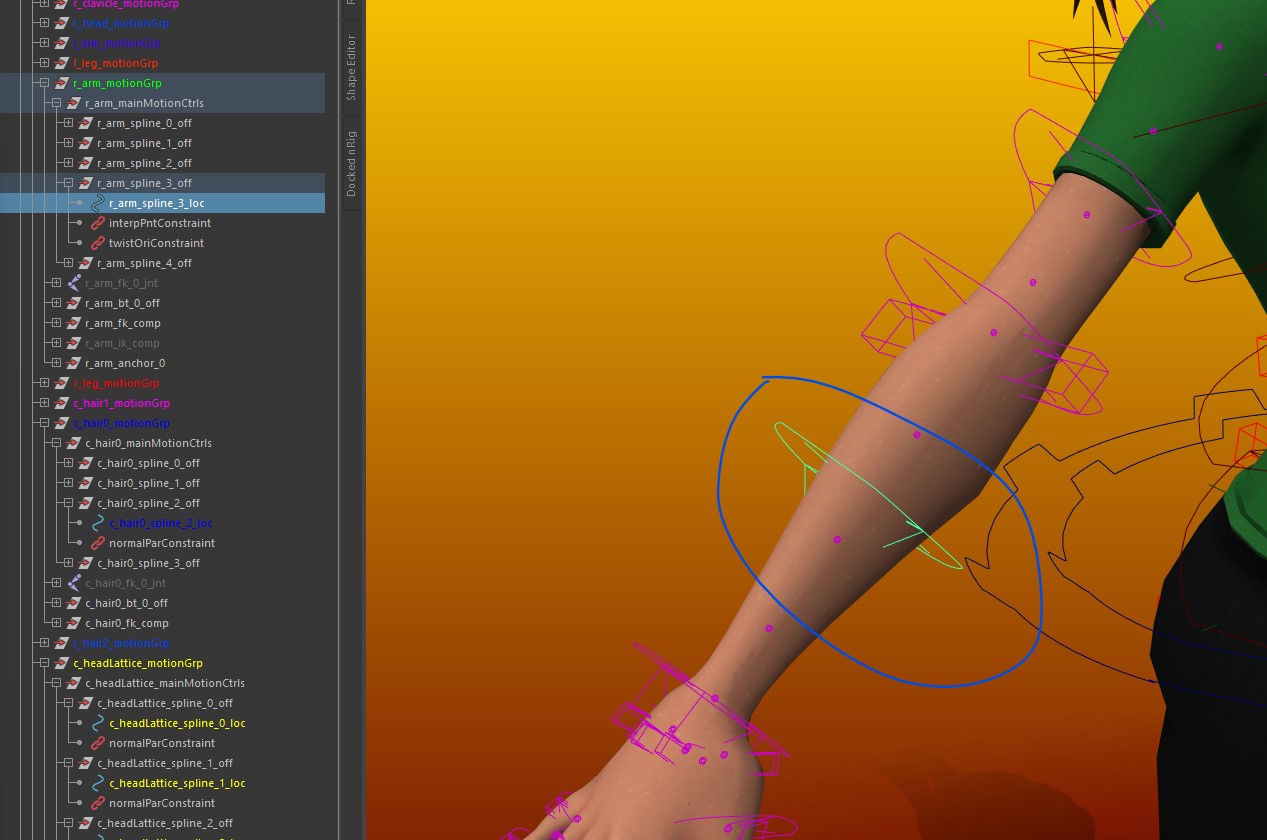
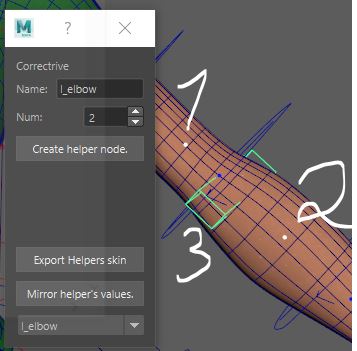
Helper joints.
To create helpers, you first need to setup metanodes for those. To do that, select drivers for corrective ( Only joints supported now ), then select a trigger (One of the main controllers) and press Create Helper node.
Now, when meta node is created, you need to save trigger pose. By setting Trigger pose you create a reverence transform for your Driver1 node. This reference transform is pareented under Driver0 node. Then weight of your helper effect is calculated based on distance between Reference transform and Driver1.
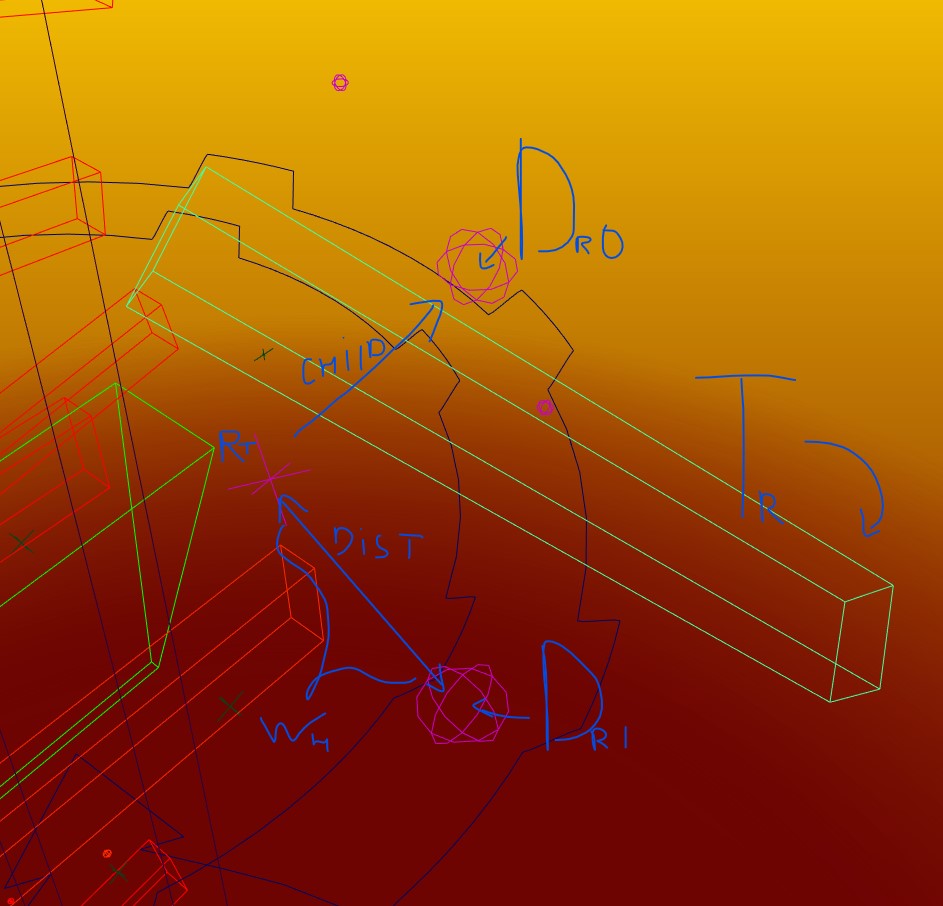
Put your trigger node to a pose that should trigger the corrective and press Save trigger pose
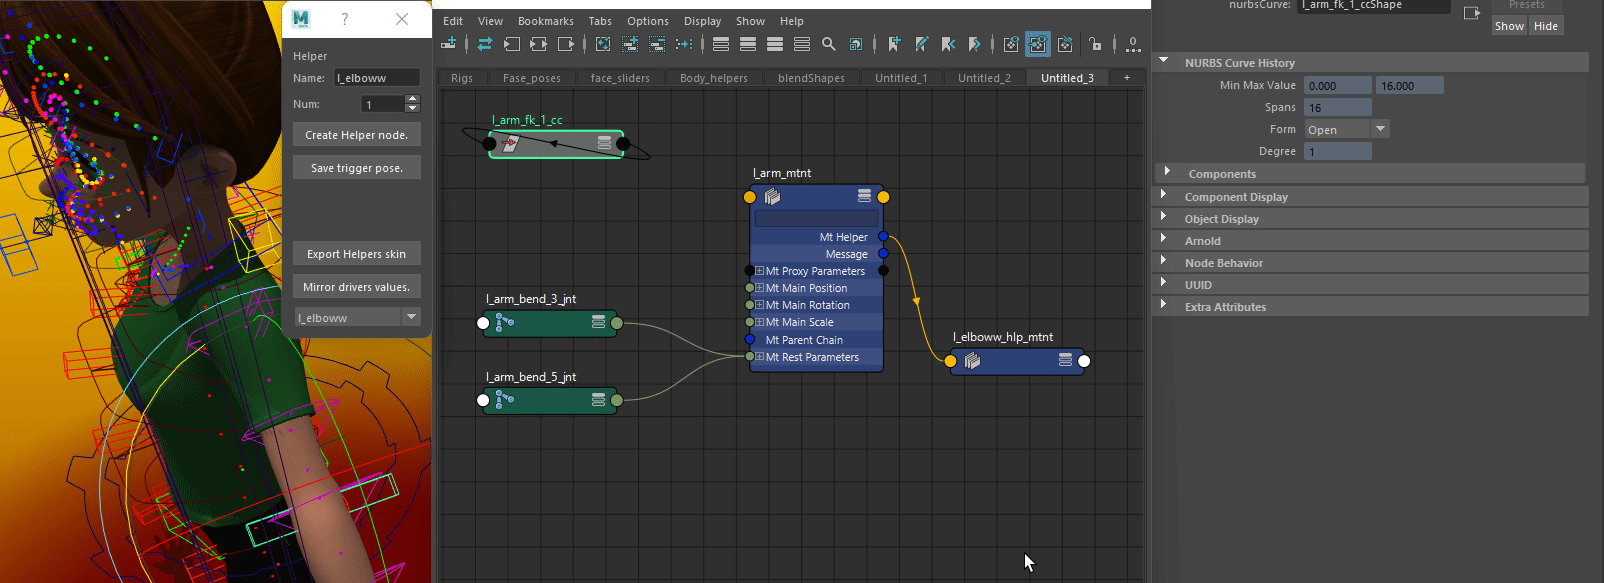
When trigger pose is saved, you can create your helpers. To do that, you should execute Other rig Stage 1 with MakeHelpers. This will create joints, offset and targets. If you did not create skin for your helpers yet uncheck “ImpHelpSkin” checkbox. Builder wont try to import skin or add new helper joints to skin cluster.
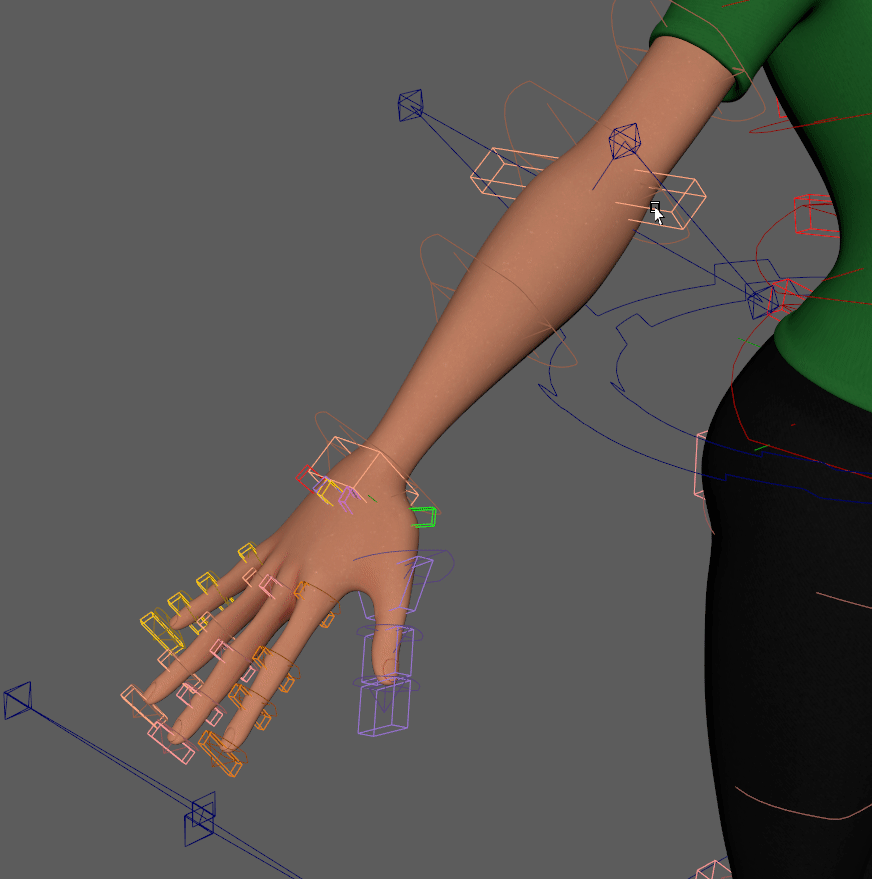
Then,put offset locators <name>_help_0_poff and target locators <name>_help_0_ploc where you need them. Offset locators are origin coordinates of your helper joints. Target locators are coordinates of where the helper joints will go when the helper pose is triggered. These positions will be stored automatically and restored on next rebuild of your rig.
You can mirror the transforms from left side to right by pressing Mirror helper*s values button. Then you skin helper joints to skin cluster of second layer ( parts_skinCluster by default ). Then you can export this skin by pressing Export helpers skin for later use. Rig will automatically import it on helpers creation of ImpHelpSkin checkbox is active.
You can tweak target locators after skinning to get the effect you want.
Note
You can tweak target locators, but not origin locators at this stage. Origin locators are already stored in bind pose.
Note
If you are planning to use deltamush, you can apply a temporary one to the skin on level 0. “body_bend” by default. And see how things work together.
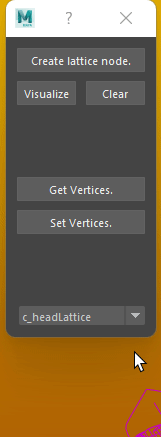
Lattices.
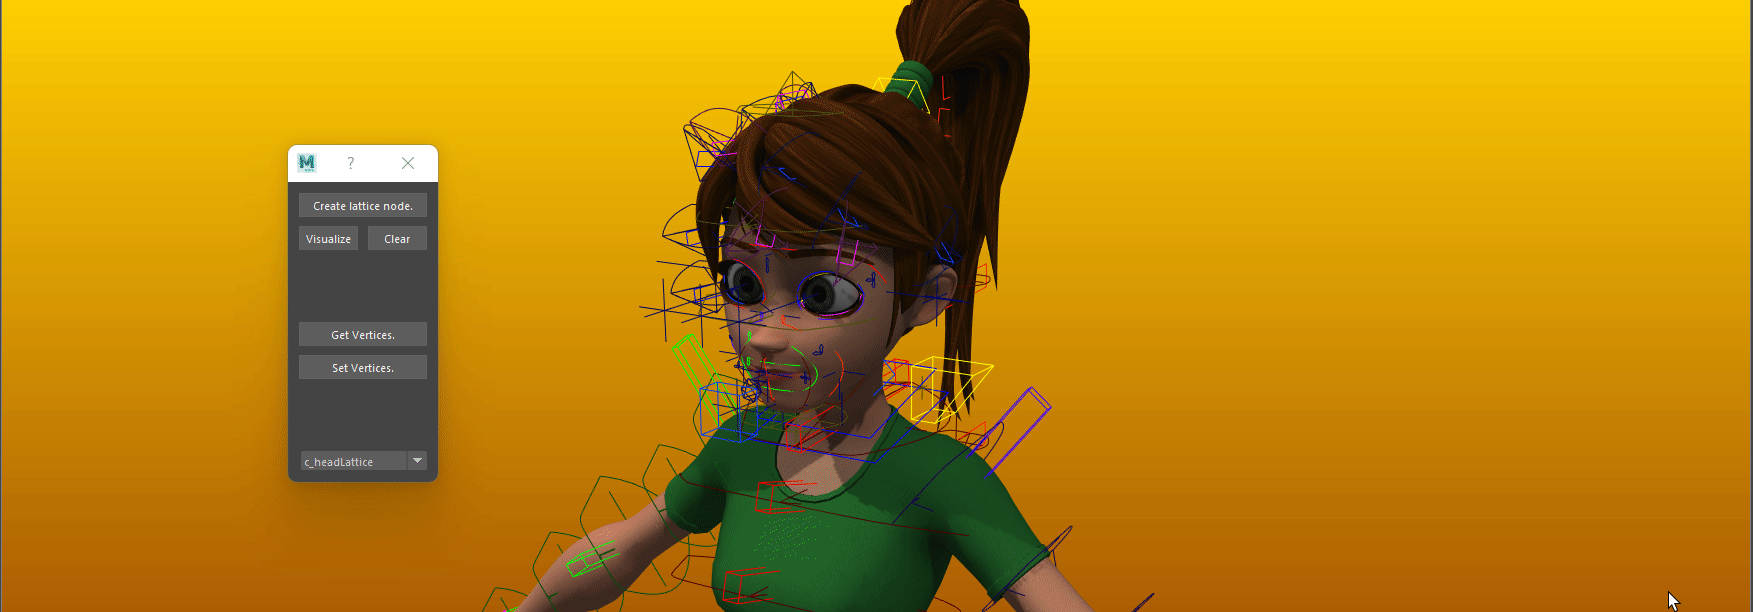
To create lattices, first you need to setup a lattice meta network. To do that, open lattice UI by clicking Lattices UI. This will call a UI and create temporary mesh to pick vertices from. List of already created lattice networks is in dropdown menu in lower part of the UI. If lattice you need is already created select it in dropdown menu and proceed to selecting vertices.
Select chain controls of a chain you want to parent your lattice to.
If you selected multiple controls, lattice’s division number will be equal to the bumber of selected objects. And lattice will be parented to chains joints.

If you select only one controller, lattice will be parented to parent bend transform of selected object. To forearm in this case.
Then you should pick affected vertices. Pick them on temporary mesh and press Set Vertices.
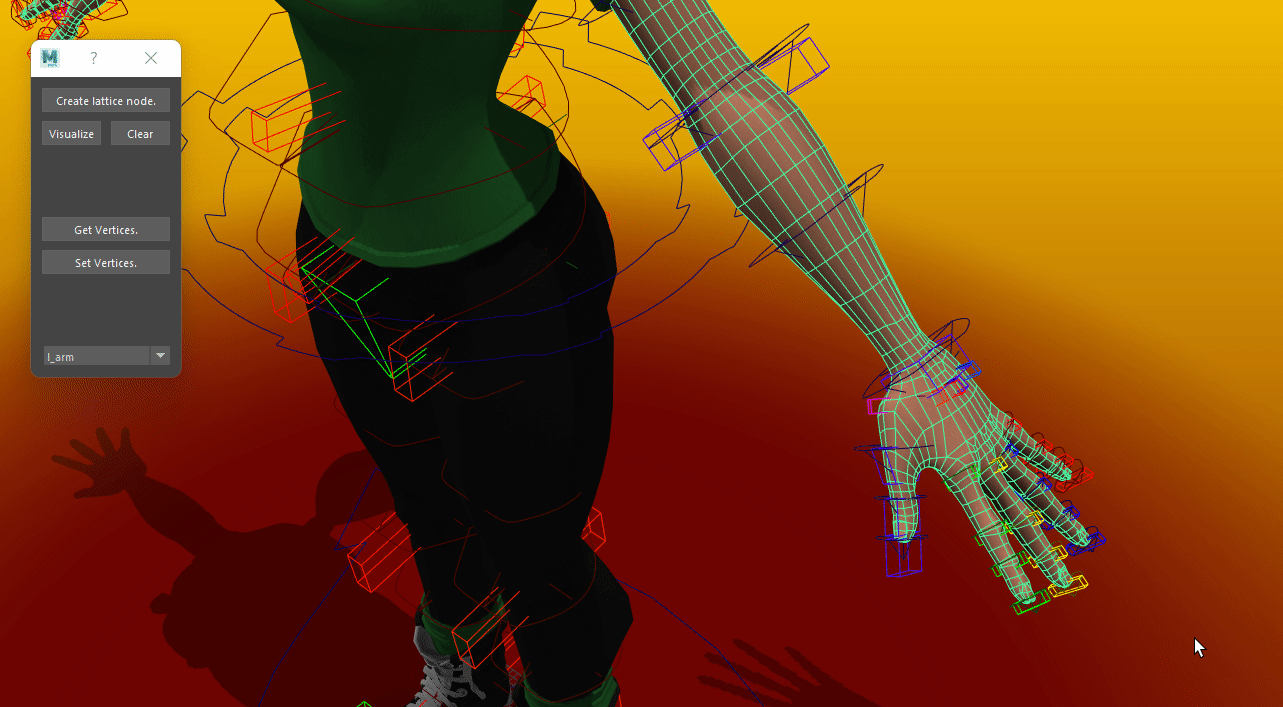
Then you need to set a default transform for your lattice. Click Visualize button. This will create a cube which you should put into place where lattice will be. Press Clear When it’s done.
Note
At the moment, if lattices are symmetrical, like left and right arm, they will apear only on the left side. Put them in one place.
Now you can rig Stage 3 of Finalization rig with lattice checkboxes on.
Deltamush.
To add deltamush to your system, press “Init Deltamush” Button under Build stage 3. This will create a deformer metanode “fullsmooth_dmsh_mtnt”. And open Meta Data editor. Set affected vertices of this deltamush and on build it will be applied.
Note
Painting weights on deltamush breaks GPU acceleration, so if you dont need some vertices to be affected, exclude them from deformer set(don’t select them).
Corrective blendshapes.
Warning
Still broken on maya’s side. Deprecated. Use helper joints.
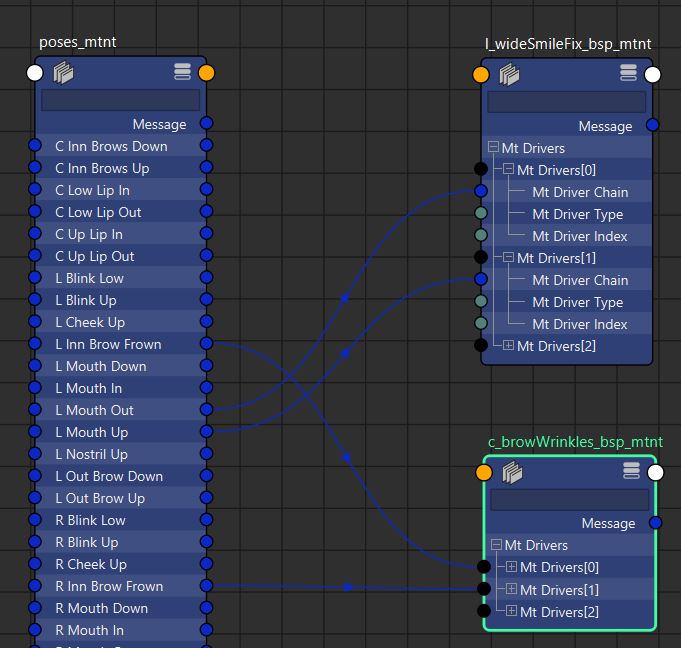
To create blendshape, you first need to setup metanodes for them. To do thatfor body, select drivers for blendshape ( Only joints supported now for body correctives), then select a trigger (One of the main controllers) and press Create blendshape node.
To do that for face, select poses_mtnt metanode and press Create blendshape node.. Then replace a message connection on poses_mtnt metanode to desired pose. Also you can add other poses into blend by adding drivers to blendshape metanode.
Also, you need to create a blendshape basemesh. If your modeller(or you) did a good job with sorting model’s meshes, you can onlu use parts of your model to improve performance. To do that, first select your blendshape in dropdown menu. Then select needed meshes from top to bottom, and press Create blendshape target.
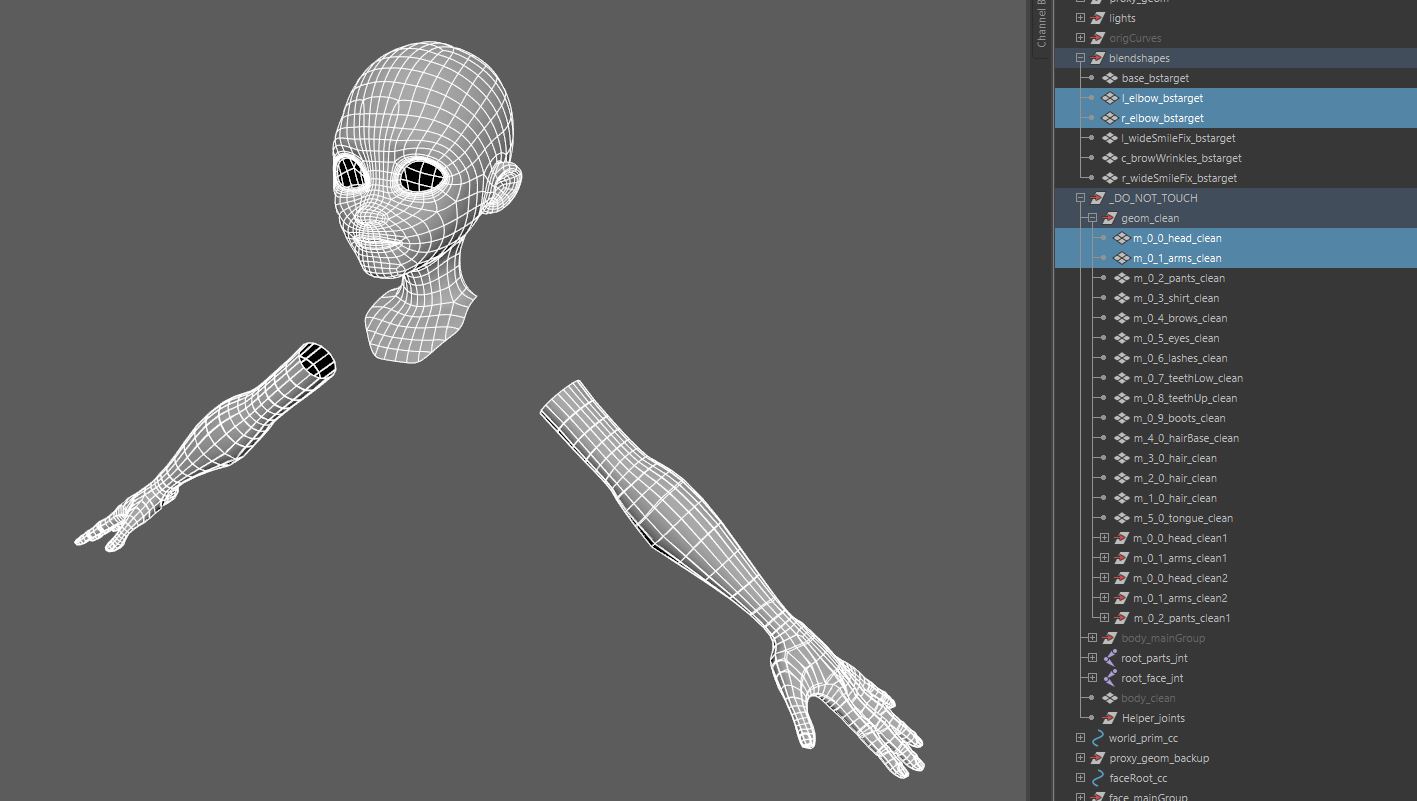
You can then send these targets to your modeller, or edit them yourself in shape editor later, when rig builder will process those. These targets will be stored in your rig file and then reused in rig rebuild. Also, you can export .shp file by clicking Export blendshapes and builder will use that. This file will be exported to your rig’s project root. Name it with a name of your blendshape node.
Now, when meta node and basemesh are created, you need to save trigger pose. Put your trigger node to a pose that should trigger the corrective and press Save trigger pose.
When trigger pose is saved, you can create your blendshapes. To do that, you should execute Other rig Stage 3 with Blendshapes. This will create your blendshapes and drivers. Then, put offset locators <name>_bs_0_poff and target locators <name>_help_0_ploc where you need them. These positions will be stored automatically and restored un next rebuild of your rig. You can mirror their positions from left side to right by pressing Mirror corrective’s values button.
Face controls attachment.
Since its quite an expensive feature, face controls of your rig are not attached to the face by default. To attach those you need to pick attachment method in combobox. You can attach to mesh, or to face joints. Face joints method is yet experimental. Joints might drift. But this method doent require hiding these controls for saving performance. Then you check AttachFaceControls checkbox and launch Stage 4 of Finalization rig.
Rig patching.
Every rig might need some extra features that are not supported by the system. To add those, you can white your own python snippet, save it as patch.py in rigs folder and check a patch checkboxex in Finalization rig settings. This will execute your snippet on rigging.
Proximity Visilility.
Rig Finalization.
Rig builder will cleanup all connections and nodes that final rig doesn’t need. Also it will set attributes for all your controllers as you had them saved with “Export Attribute Values” button. Legs are set to IK, or eye bulge values tweaked etc.