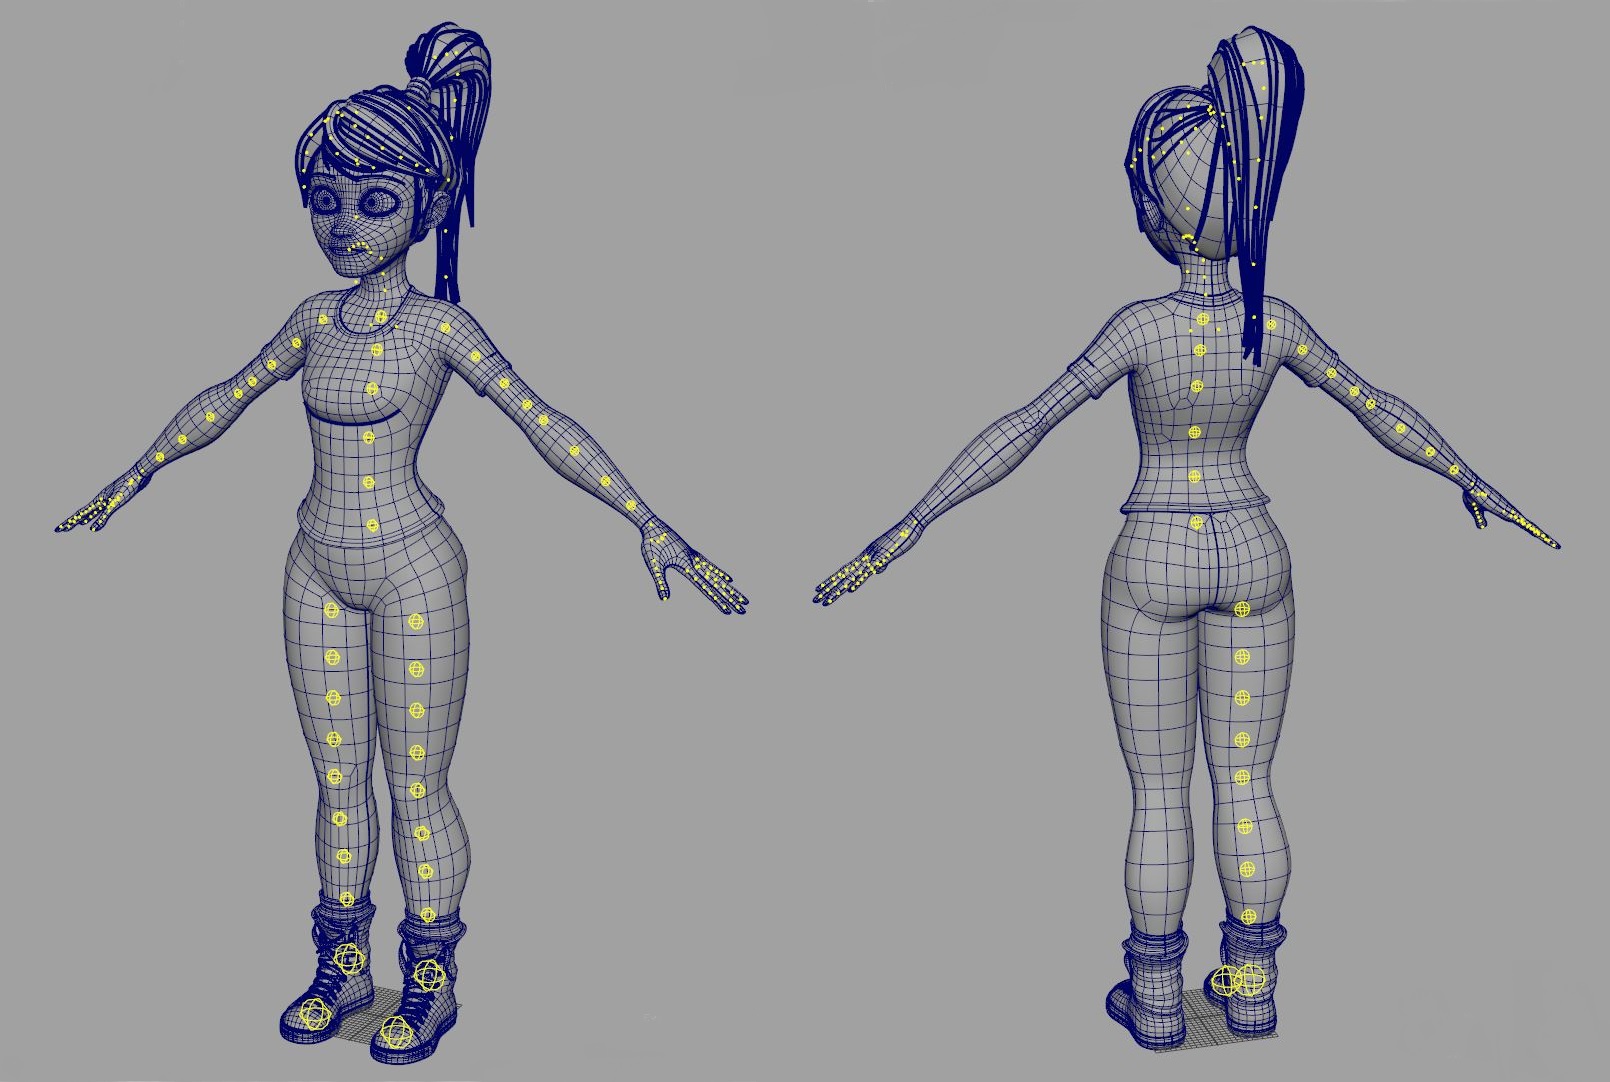
Model requirements.
Example model is in docs root/Model_Example.mb
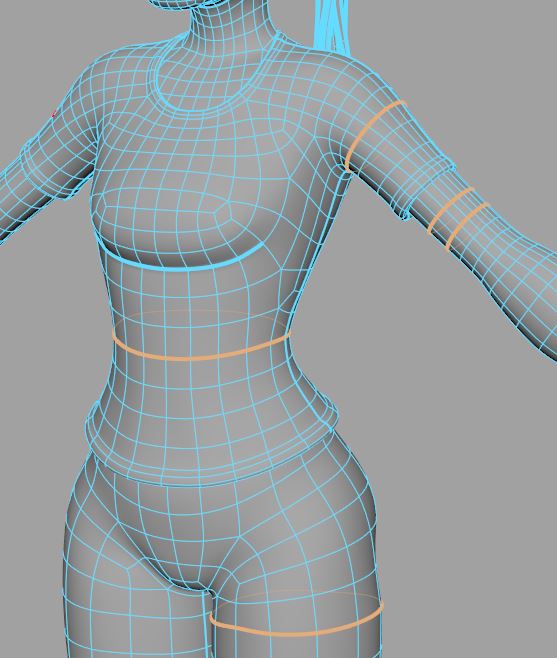
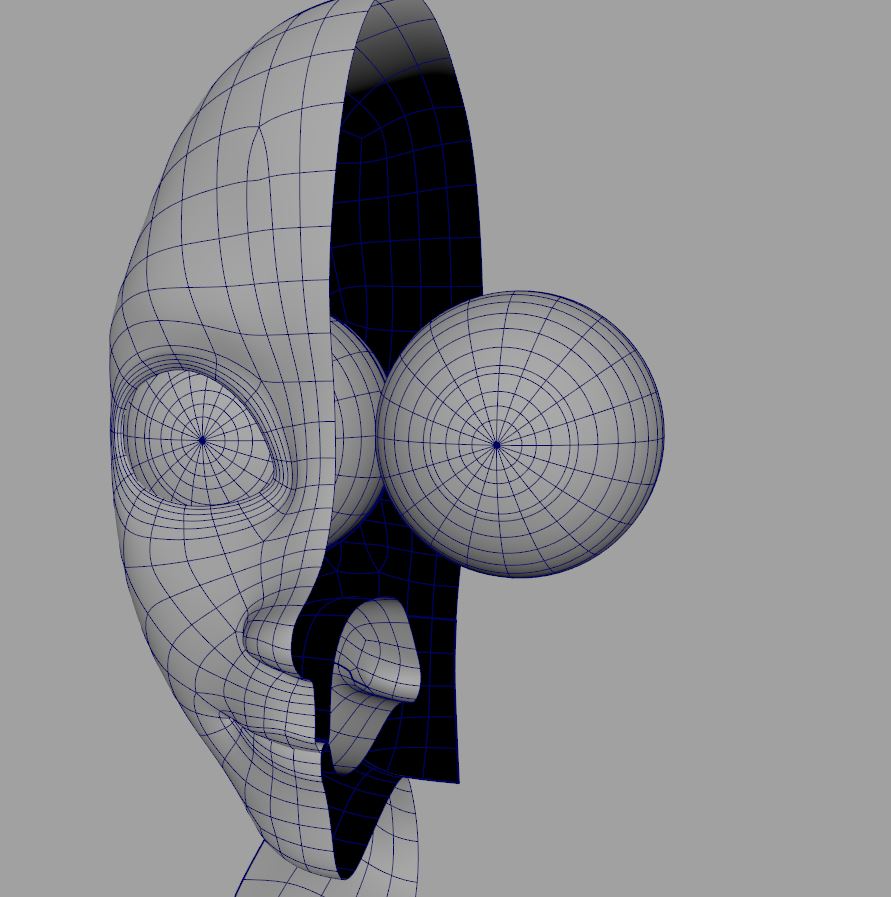
Base deformations in this rig are driven by joints, so a clean topology is very important. It is advisable to use only quads, which sides don’t differ too much. For places where bones will stick out(like knees, elbows, fingers), it is advisable to add some topology. Don’t smooth the model unless there is a good reason. You will just make riggers life harder and reduce the FPS.
For elongated areas, loupes are better than spirals.
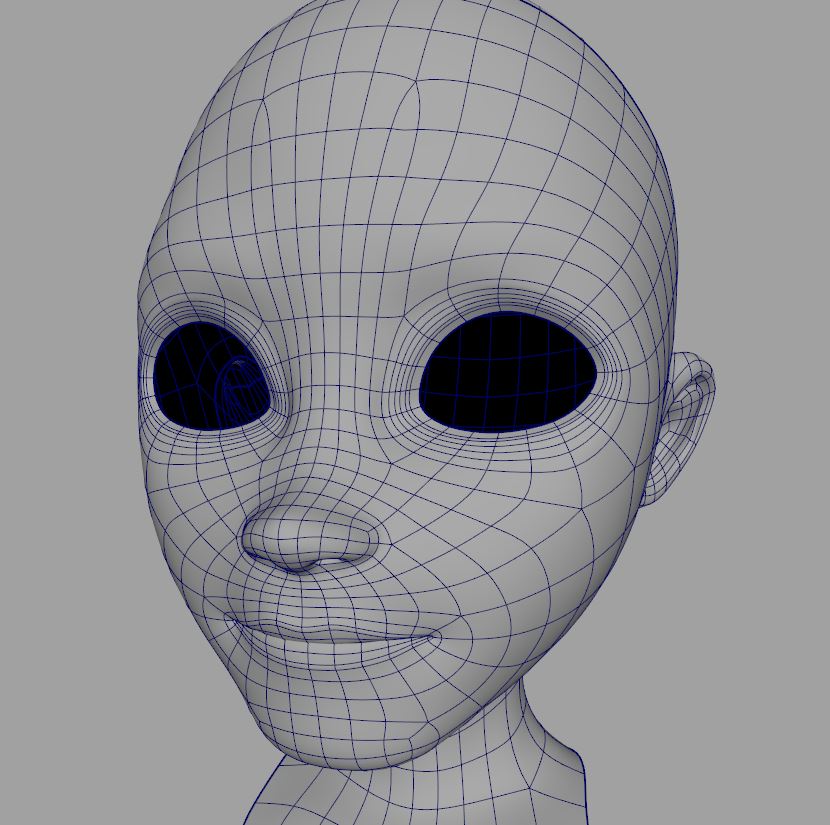
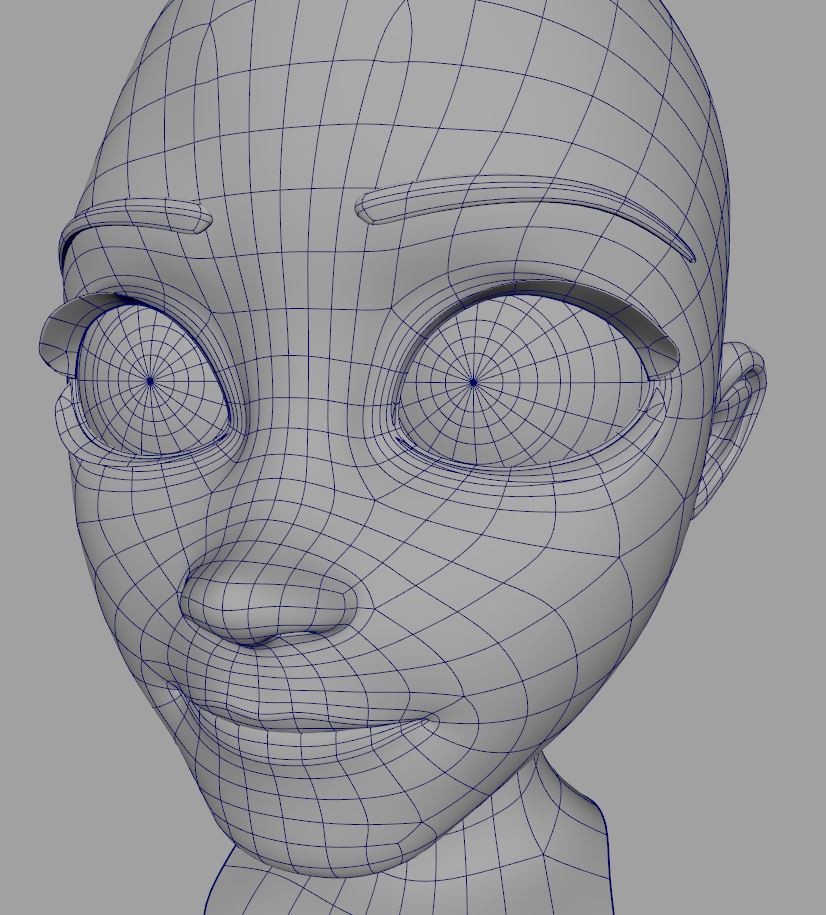
It’s best to follow these guides when modeling a face. If you don’t really need to use your unique topology, then you can wrap our mesh onto your model. No need to preserve vertex order. You can only wrap on the T-zone, eyelids, and cheeks.

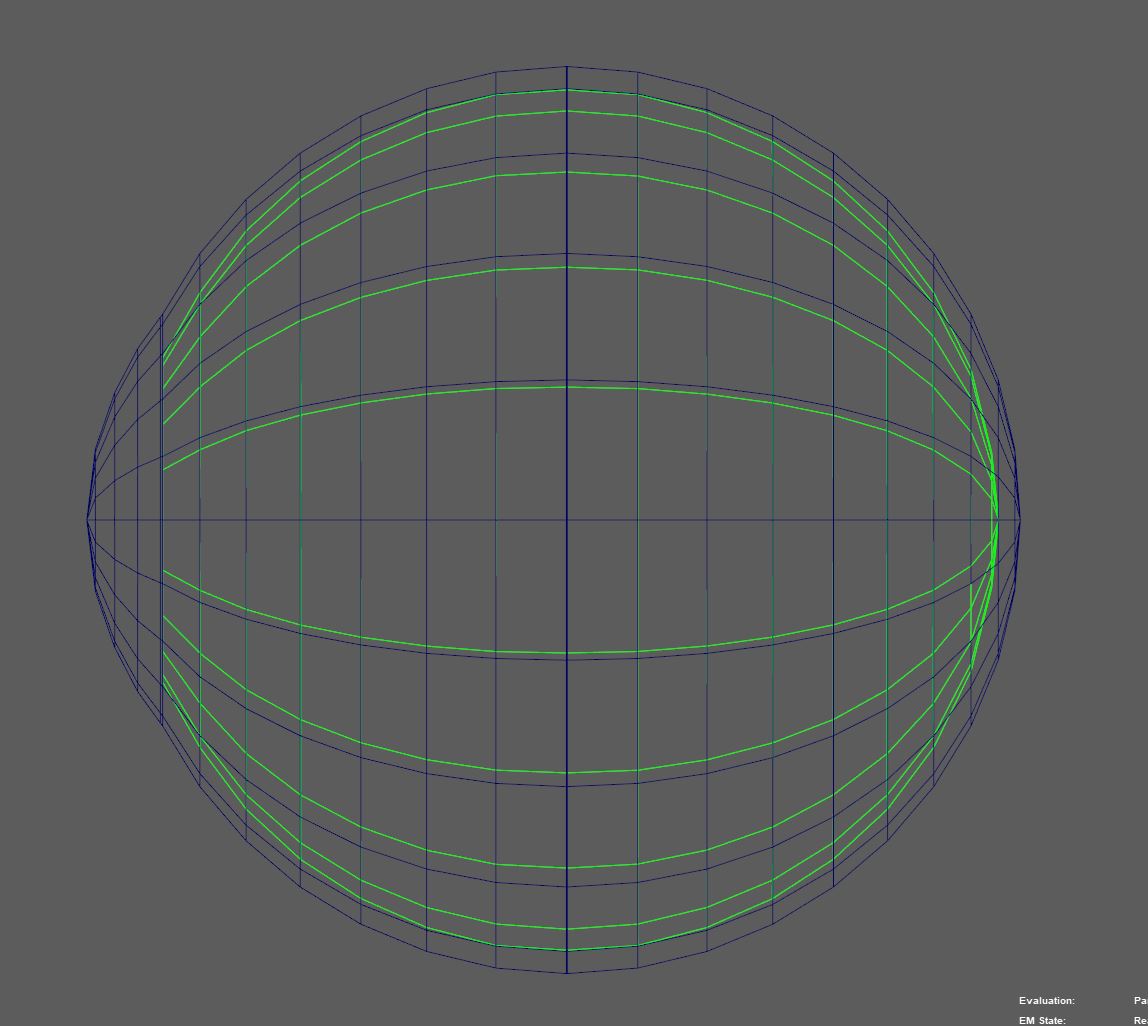
Eyes can be spherical and have one layer.
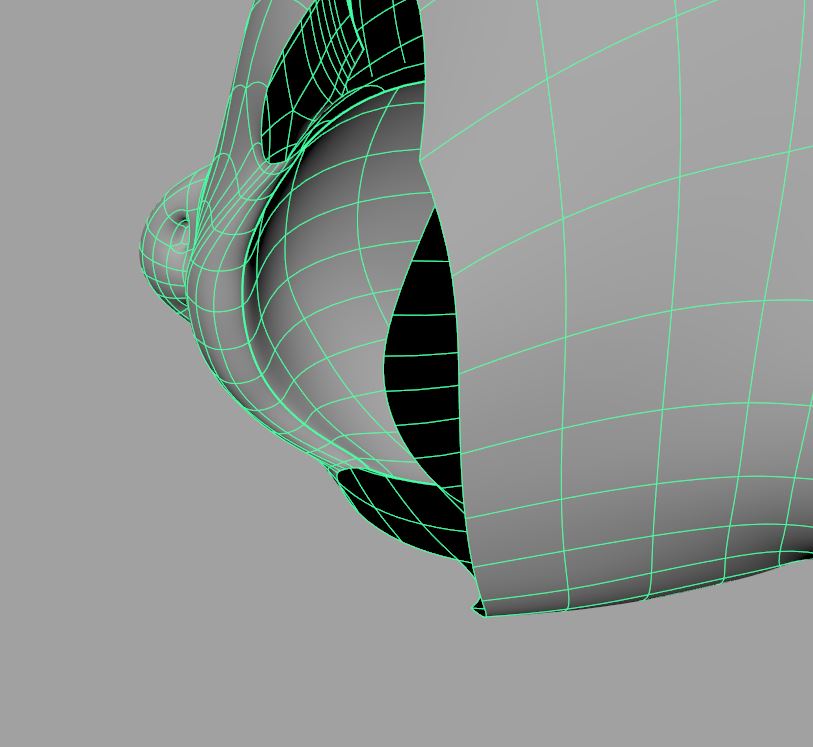
If you have two-layered eye, then inner eye iris area should be flat and look like on screenshot below. On flat area: one support loop and one middle loop to scale the pupil.
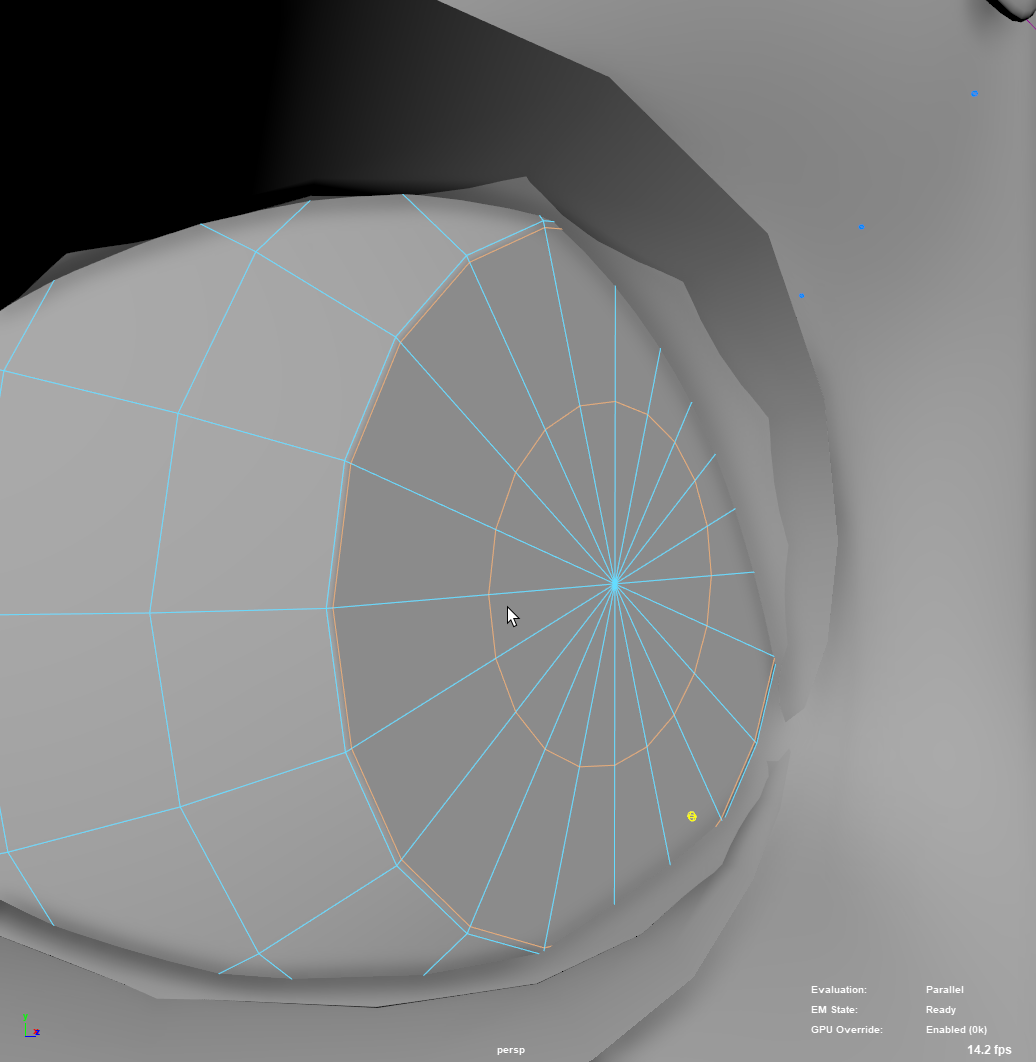
Outer eye can be a clean sphere or have bulge on iris. Bulge has to start like this:
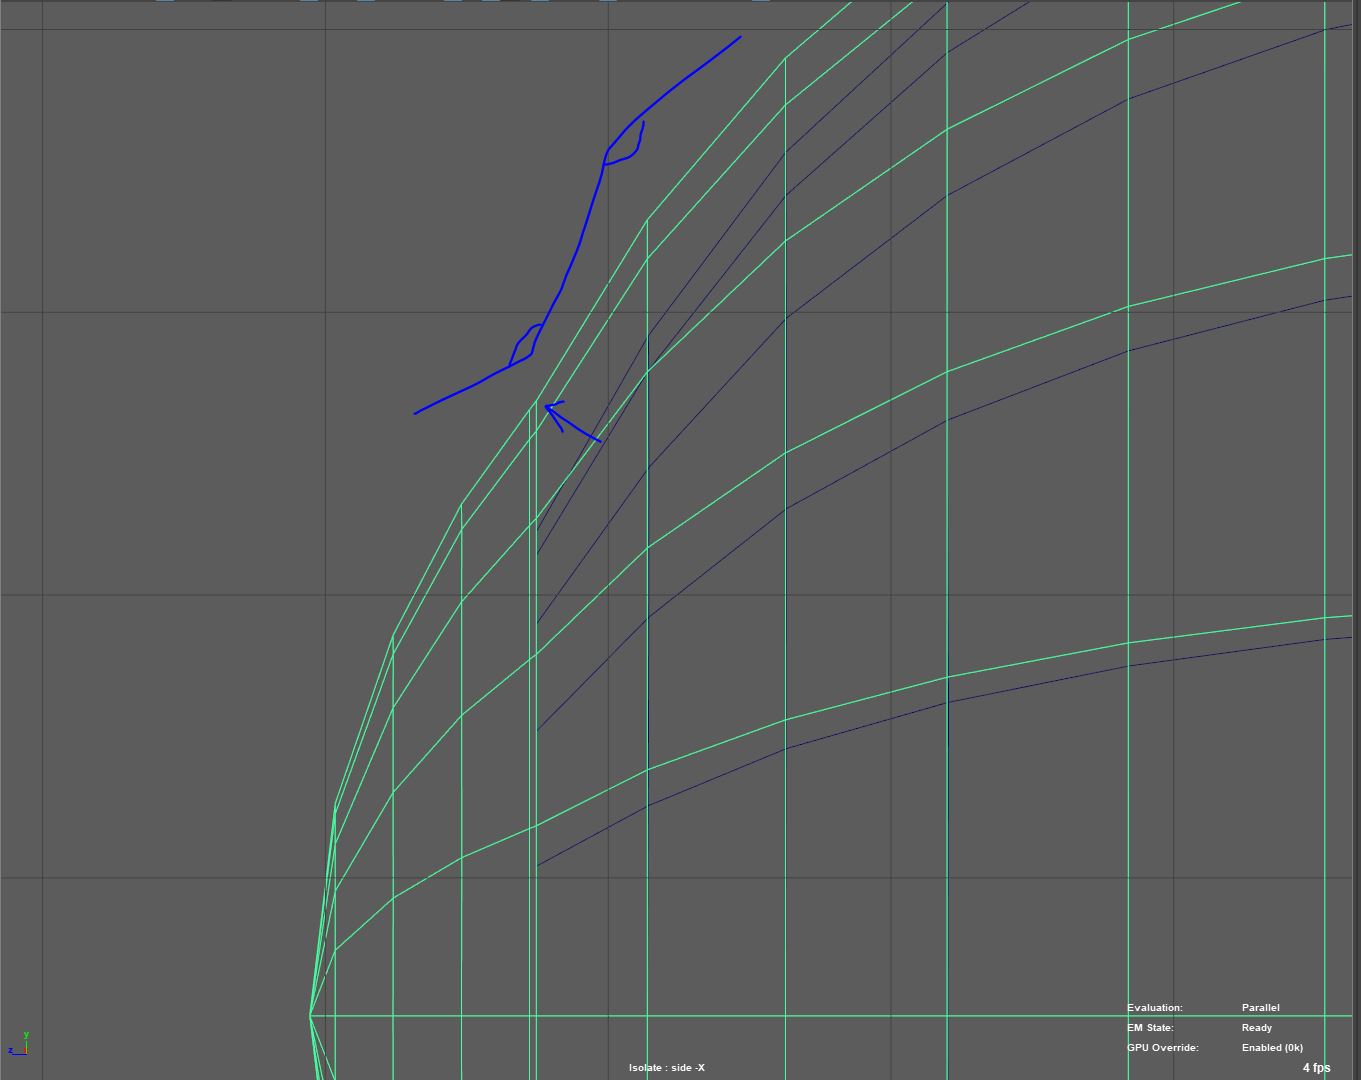
This way rig knows where bulge starts and can rig accordingly. Don’t do this agle flat. Curvature should reverse here. At least a tiny bit.
Bulge has to be spherical. Use nurbs sphere to make it this way.
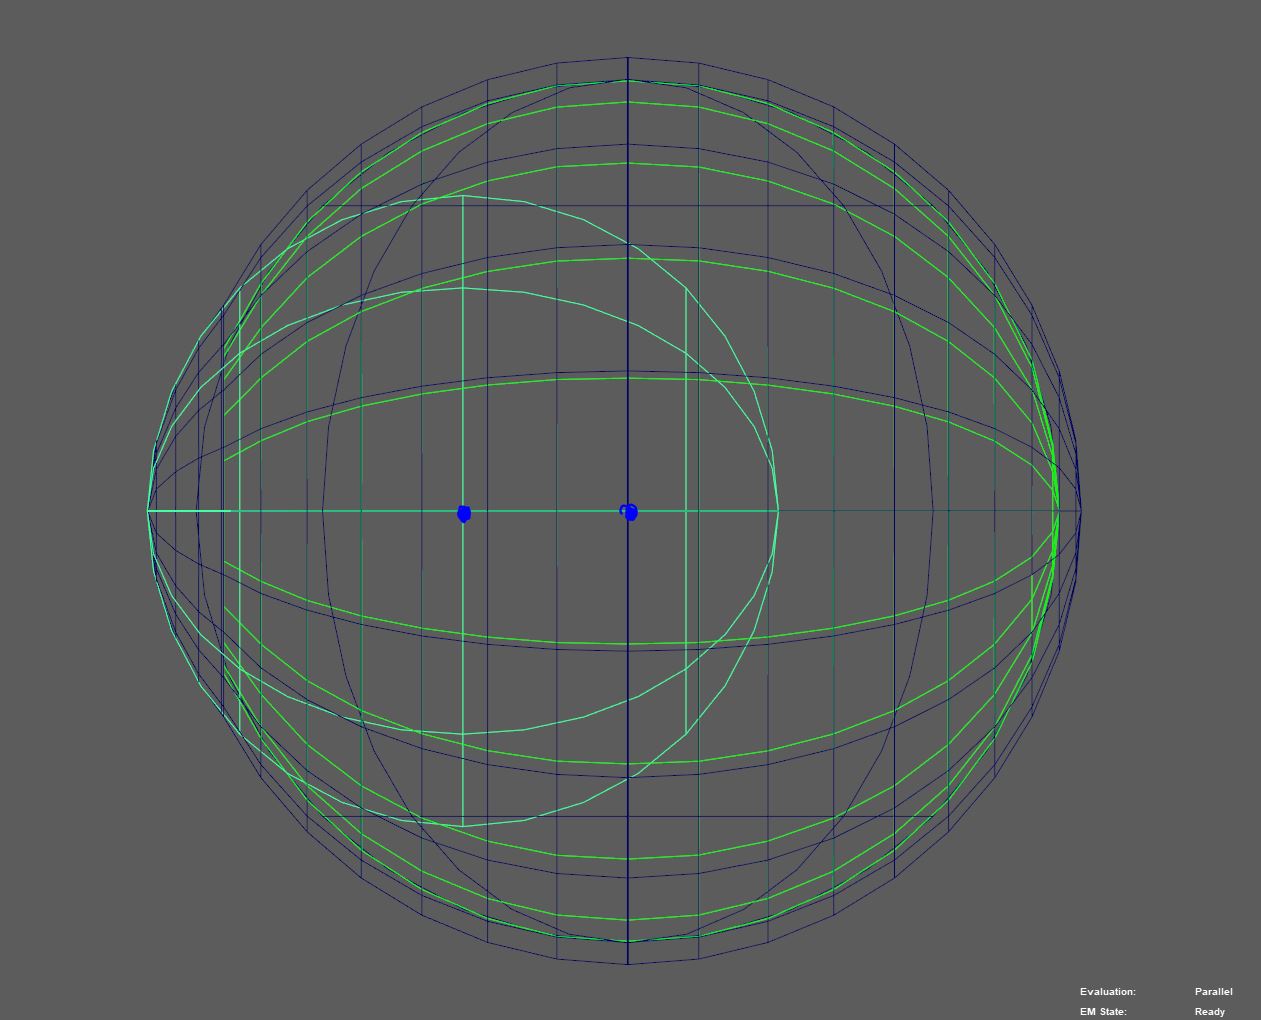
Outer and inner eye’s loops should be on the same Z-axis values. This way rig will produce less joints and the result will look beter. Do do that you can first scale inner eye as you like and then use nurbs sphere as a live surface to align loops.
When modeling the eyes and mouth, try to keep the number of loops at the top and bottom the same(Otherwise blinking and zipping wont look very nice) The corner loops can be ignored. When modeling eyebrows, eyelashes, beards, patches etc. , try to match their topology to the topology of the skin (At least in places where it contacts skin).
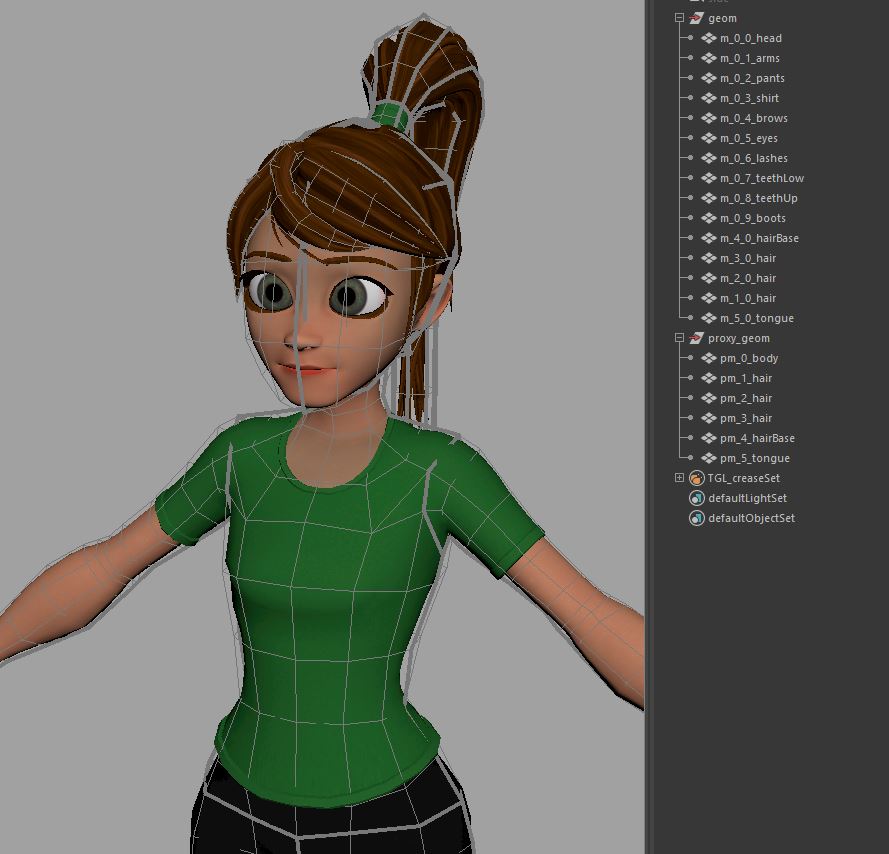
When the model is done (or if you’ve done something that can already be sent to your rigger) Sort the meshes in “geom” group in descending order of the number of possible blendshapes to be added to them in future and never change their order again. Otherwise, it will later change the order of the vertices on the final mesh. It would also be better for you to make a proxy mesh so that the rigger does not waste time on this. The proxy can even be just a duplicate of the main mesh. Ofc would be better if it is simplified. You can use a proxy mesh from brevious project, if its a humanoid.
Although there are ways to work around changed proxy mesh topology, it’s better to never change it after it’s sent to rigging. Rigger will make a skin on this proxy mesh, and if you change vertex order, the skin will no longer be valid.
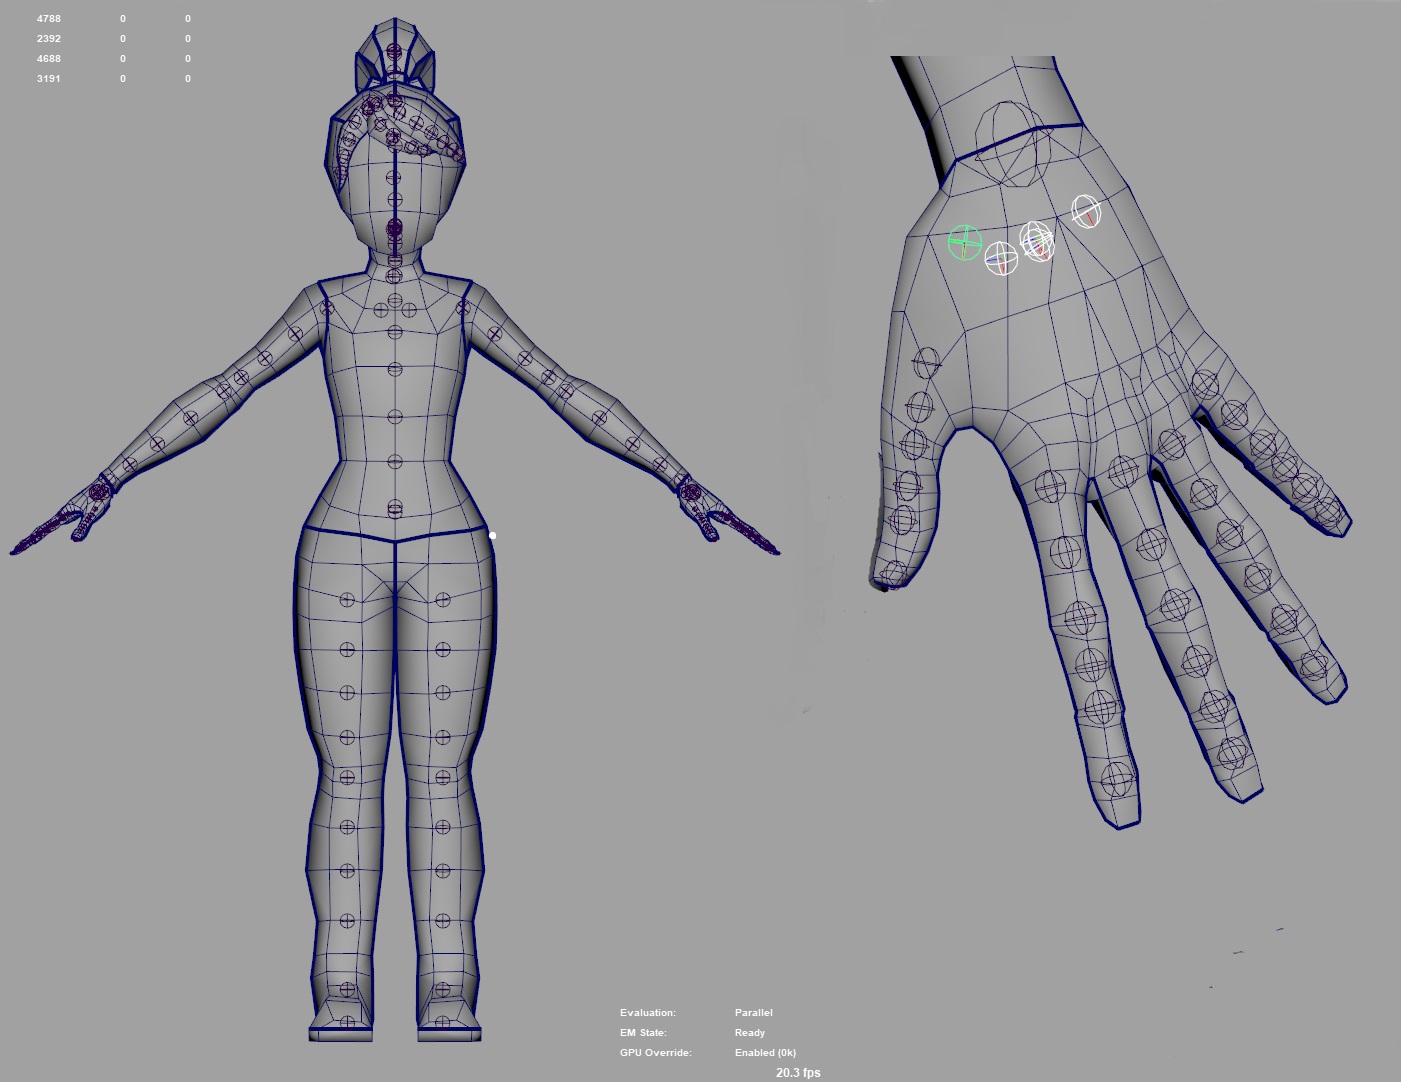
Here is how joints and proxy mesh loops are laid out on our rig. We find this scheme the most convenient for later skinning.
Until the rigger starts manually refining skin clusters on the main model or making blendshapes, you can still add or delete vertices(e.g. change the vertex order) on the main model. Just warn the rigger that it’s changed or they will have hard times figuring out what happened.
When skin clusters on the main model are refined or blendshapes are created it is better not to change the order of the vertices (especially on the face), otherwise, the rigger will hate you. It is better for you to tell the rigger in advance that something may still change in the model so that they do not start doing the work that will have to be started over. There is a little trick on how to avoid this. When Maya merges meshes it adds the indices of the next mesh to the vertex indices of the previous one. That is, if in a geom group you put your face in the first place, and, say, your hands in last, then adding or removing vertices on the arms will not break the facial rig. But also adding a vertex to the face will break the blendshapes on the hands. If you are going to work at the same time with the rigger, then you better discuss in what order you will work on the character.
Also, for optimization purposes, the rigger will remove parts of the model that are not involved in deformation on the blendshapes, so put those parts of the model where blendshapes may be first in the list (Face, arms, legs, fingers)