Project setup.
Copy a template folder. Give it a project name. Follow the naming convention.
Launch the script provided in installation guide, navigate to the folder you’ve just created.
- Save your files as project files.
Model / proxy file
Rig network file
Utilities file.
Final iterations file.
Version Control.
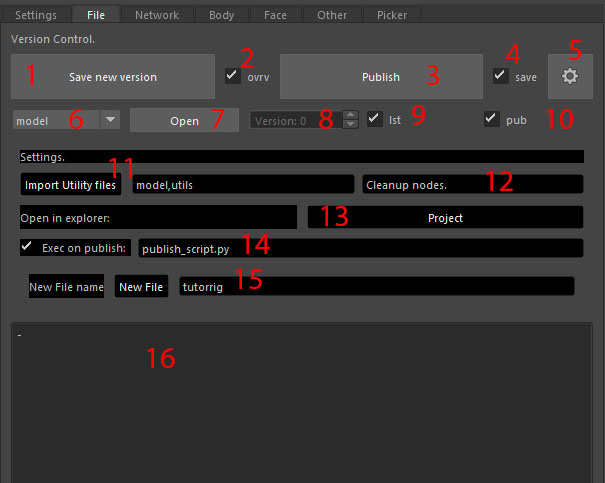
- Save new version
Incremental save for your current file.
- Overwrite
If checked, won’t create a new file on incremental save, will overwrite the newest one.
- Publish
Copies current file to published folder. All import functions will use that file.
- Save before publish
If checked, will first save your scene and then copy it.
- Settings
Opens settings tab below.
- File type to open
All file types have dedicated folders with versions.
- Open
Opens the file you chose.
- Versions
Open button will open this version of file.
- Open last file
Open Button will open the most recent version of the chosen type.
Pub Open Button will open Published file.
Import Utility files Textfield and a button. Type in file times you want ti import to your scene and press. On scene wile will reimport those files for you.
Cleanup Nodes Will add these nodes to Cleanup selection set. Type names separated by comma. Members of this set will be deleted on rig finalization.
Open project folder in explorer
Publish script Will execute this python script after publishing a file. This way you can cleanup your published scene from any garbage nodes.
Add new file type. Type in a name of a new file type and press New File.
Notes Here you can log your changes made to the file of current type.